To uninstall Facebook updates, first, open iTunes on your PC and find the IPA file of Facebook. Copy and paste the file to another location. Delete the previous one and put the copied file in the IPA location.
Next, connect your iPhone to the PC and go to the app drawer. Then uninstall and reinstall the app. You can also use third-party iPhone managers for simplifying the process.
New updates are not always user-friendly, and Facebook is notoriously famous for software bugs. In such cases, you can uninstall the Facebook update or turn off the auto-update. That’s why you need to know how to uninstall Facebook updates on your iPhone.
Updates can be irritating because of the bugs and faulty features. So, uninstall the updates you don’t like.
Contents
Why Uninstall Facebook Updates On Your iPhone?
App updates give you the latest versions and features to provide a smooth experience. However, sometimes the updates are not worth installing because of issues like bugs, delayed opening/closing, etc.
Facebook also has some problems with the updates. So, customers might not want to install the new updates or delete them from their iPhones to avoid notifications.
However, let’s see some common reasons why you should uninstall Facebook updates on your iPhone:
Bugs
One of the core reasons for not getting new updates on Facebook is bugs. Based on Facebook’s reputation, bugs often reduce the smoothness of the application, and it comes with the latest versions.
That’s why customers like you don’t want to update the new version and, in fact, delete the updates. As an iPhone user, having apps with bugs can’t be appreciated.
Don’t Like New Features
Some users want to stick with the present version and don’t want to shift to the latest update. And it’s pretty standard because some features are just minor or useless updates.
So, you might want to delete the latest update from Facebook on your iPhone.
Avoid Getting Notifications
Whenever a new update comes for a certain time, it continuously alerts you until you update the app. So, if you don’t want to update your Facebook app, you can just delete the update from your iPhone.
3 Ways To Uninstall Facebook Update On Your iPhone
Don’t want to install the new update from Facebook? Then delete or uninstall it. There are various ways to uninstall the Facebook update from your iPhone. If one method stops working, you can just try another one.
Here’s the are a detailed discussion of each method to uninstall Facebook updates:
1. Uninstall iPhone Facebook Update Via iTunes
With iTunes, you can easily undo the Facebook update. For that, you need to sync your iPhone with iTunes. Typically, updates on any app in iTunes fix the previous troublesome issues. Keep in mind that this method only be effective if you’re running iTunes 12.7 or older versions.
Follow the steps to delete Facebook updates:
Step 01: Find The IPA File
First, you need to sync your iPhone with your iTunes account. After that, go to iTunes from your computer. iTunes will automatically save the previous version of the files on your PC.
All you need to do is just find the IPA file. There can be two situations: you are a Mac user or a Windows user. However, in both devices, the option will be the same. Here’s what to do:
- Go to the trace user option and find “music” from the menu.
- Next, go to iTunes and select “iTunes media”.
- Finally, select “mobile application”.
Step 02: Copy And Save
Now you need to trace down the Facebook application from the menu. First, find the IPA file of the app.
Then make a copy of the IPA file and save it to another folder. It would be best to keep the copied file in the desktop menu. Then, it will be easy to find it for further use.
Step 03: Start iTunes
After that, you must click on the “iTunes” option. And then go to my apps option. It’s a platform to allow you to buy or sync various iOS apps.
Therefore, you will also find the Facebook app and related updates on my apps option.
Step 04: Check Version
Search for the Facebook app on the menu. You need to right-click on the app icon if you see the app. See the “get info” option on the pop-up. Tap on it and go to the “check out version number” option.
The running Facebook app version will appear on the pop-up window. You must go to the next step if you don’t see it. But when the version number appears, you can skip some steps and go straight for step 8.
Step 05: Delete The IPA
Now, you must delete the existing IPA file. And it should be before you trace the needed IPA file.
After that, go to the Facebook app and right-click on the icon. Next, tap on the “windows explorer” or “finder” option. And finally, you need to delete the IPA file.
Step 06: Find The Previous Saved IPA
It’s time to find the previously saved IPA file and select it. Then, again, open iTunes and go to the Facebook app.
In the same way, make the right click on the icon. Again, the pop-up will ask to locate the IPA file. That’s because it no longer has the older IPA file.
Step 07: Select the Location
Now you must select the location of the previously saved IPA file on the pop-up screen. Then, choose the file and move forward.
Remember that you can’t move for further steps if you don’t delete the IPA file, just like the instructions said. Otherwise, it will install the updated version of Facebook on your iPhone.
Step 08: Connect iPhone To PC
Use a USB cable to connect your iPhone to your Mac or Windows PC. And then, go to the “connected devices” option. Next, select the “apps” option.
Step 09: Stop Auto-Updating
See the “remove” button next to the app. Tap on it. It will ensure that your iPhone won’t go for auto updates of any app.
Step 10: Reinstall
Your app will be uninstalled when you click on applications. So, reinstall Facebook on your iPhone. Then, wait for some moment to sync iTunes with your Facebook app.
2. Via Third-Party iPhone Manager
Various third-party iPhone managers can help you to delete any app updates on your iPhone. AnyTrans is one of them. Here’s what to do:
Step 01: Install AnyTrans on your Windows PC or Mac. And run the app.
Step 02: Use a USB to connect your iPhone to the computer.
Step 03: Tap on the “app” icon on the left-right corner of the window.
Step 04: Sign in without an Apple ID.
Step 05: Choose the Facebook app to manage. Download the app from the app library.
Step 06: Go to the main interface and then the app downloader.
Step 07: Check the app version and select which version you want to install.
3. Turn off the Auto Update Option From iPhone Setting
You can also turn off/disable the update option from the Facebook app. Here is what to do:
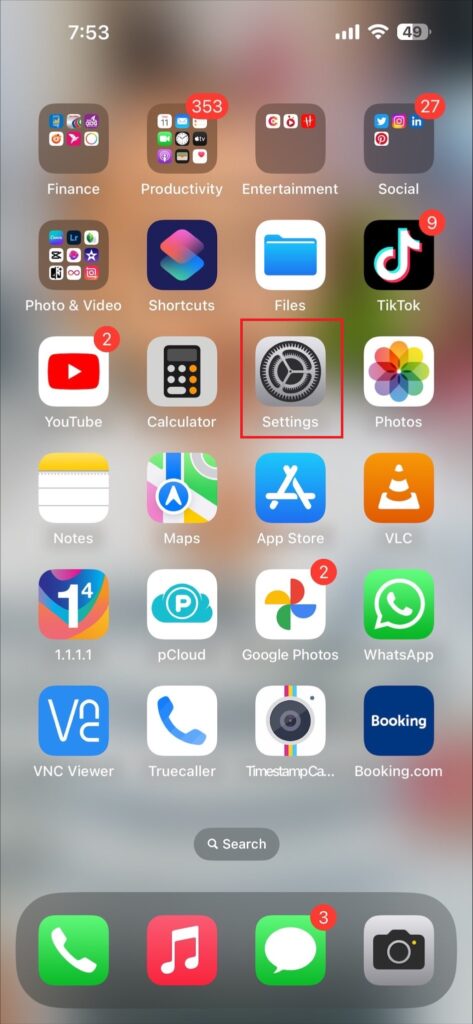
Step 01: Go to settings and scroll Down.
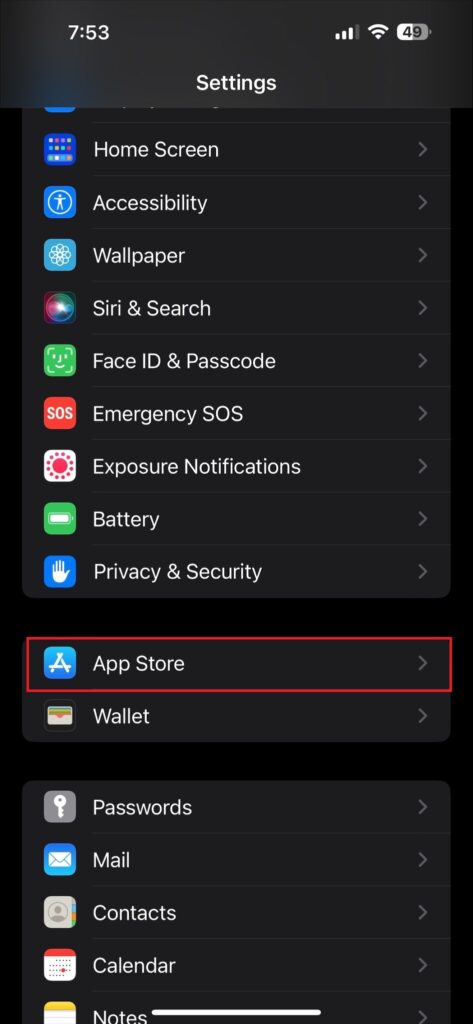
Step 02: Then go to iTunes and APP store.
Step 03: If you see the update button is enabled, now Disable this Option.
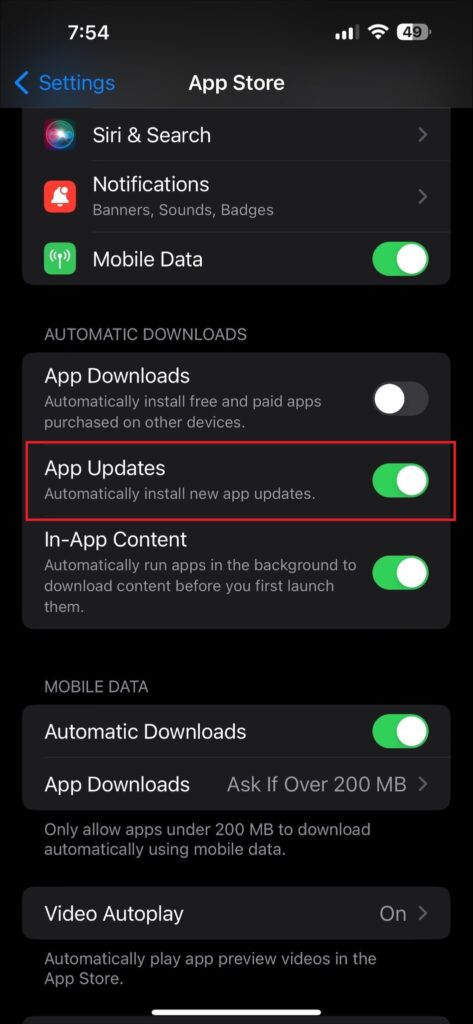
After disabling this option now Go to the Nest Setting to Completely Turn Off.
Step 01: Go to settings.
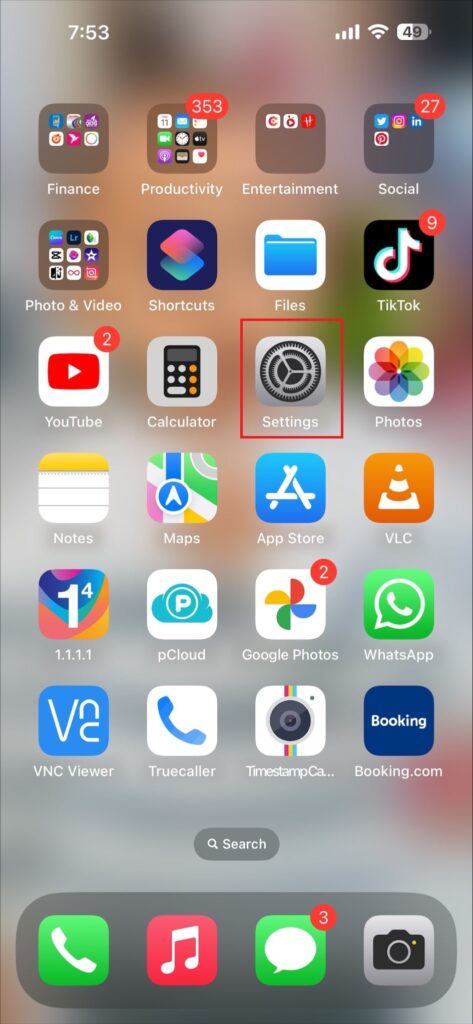
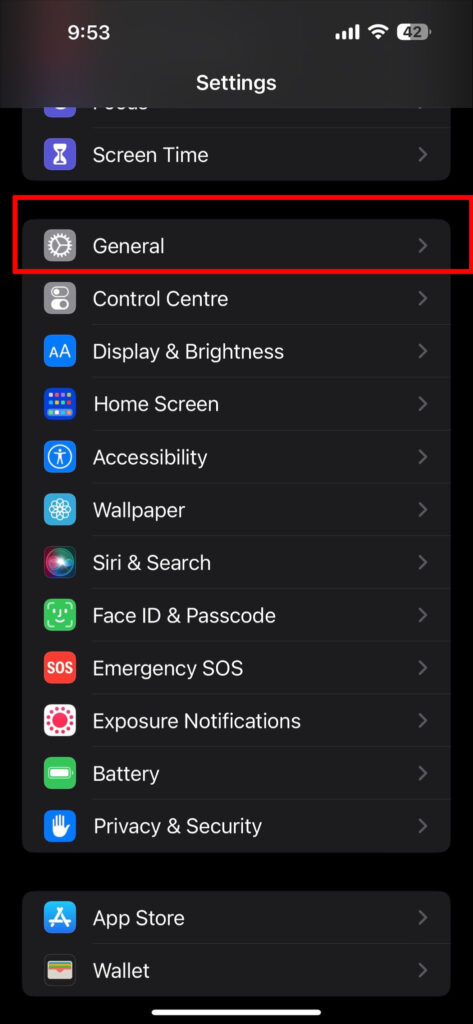
Step 02: Then go to General Options from Settings here.
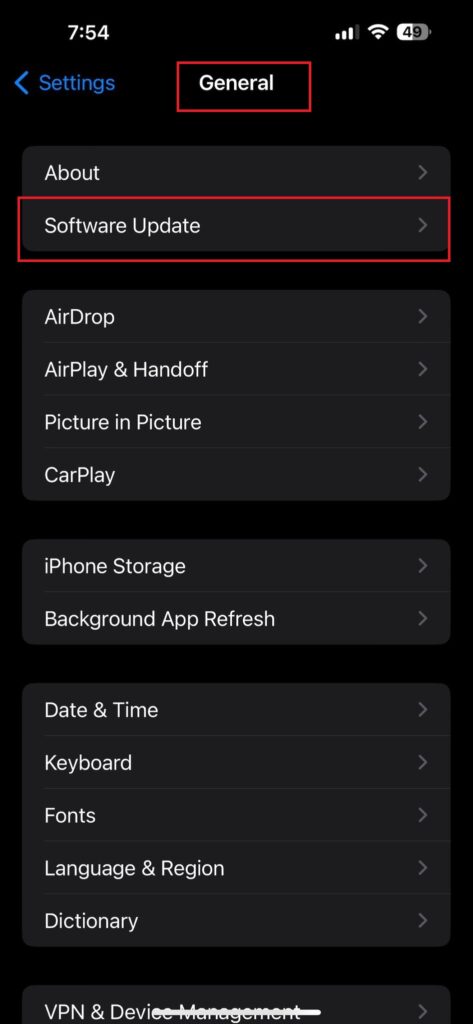
Step 03: Now, go to software Update.
Step 04: And Now you can see the auto update feature. and It is turned on. Let’s Disable the option.
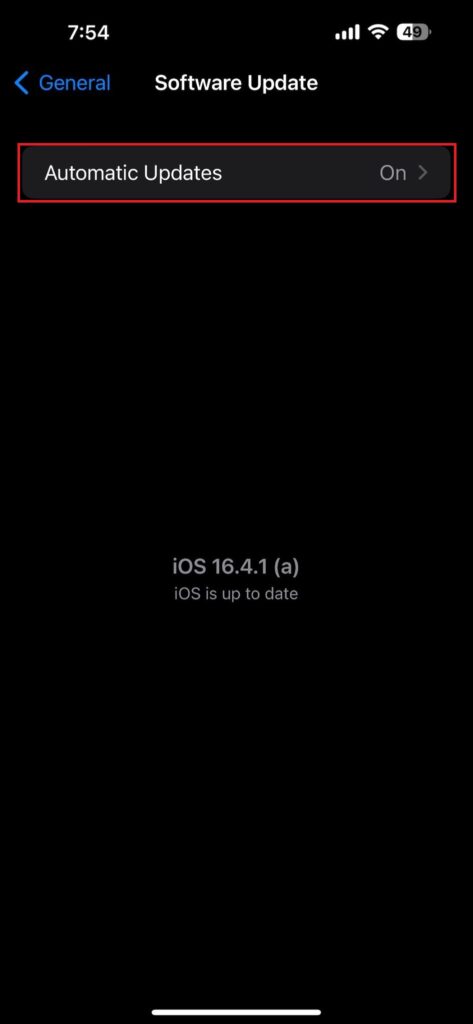
If I don’t want your iPhone to automatically download the latest version of Facebook, then you can also disable this option. It will prevent your iPhone from automatic Facebook app updates.
Frequently Asked Questions (FAQs)
What will happen if I undo a Facebook update?
Undoing a Facebook update won’t do much to your app unless there’s no major bug problem. It will just take your app back to factory settings.
But if there are bugs or new valuable features, your iPhone will continuously face bug issues and be deprived of new features.
Can I reverse my iPhone update?
Yes, you can reverse the iPhone update. But for that, your iPhone should be in recovery mode. Then iTunes will show a prompt screen to restore the app versions.
You just need to tap the restore button and choose the update option. Next, agree to the warning pop-up. Then your iPhone will install the previous iOS version automatically.
Will undoing the Facebook update delete my data?
No, undoing the Facebook update won’t delete your data. Undoing is just an opinion of not getting the latest version. It won’t remove any personal information.
Whenever you delete or uninstall an update from Facebook, it just takes the app to factory settings. Therefore, you won’t need a factory reset for your iPhone either.
Final Words
Facebook updates sometimes introduce new features and fix bugs. However, many users find their current version to be comfortable and don’t want to update it. So, they can easily delete or uninstall the new updates with the proper instructions.
Hopefully, the discussion has taught you how to uninstall Facebook updates on your iPhone. Just follow the procedure and delete the updates. It’s best to disable any automatic update option for Facebook if you’re comfortable with the current one. Best wishes to you!
