Are you experiencing a delay in transferring data to your new iPhone? The reason could be that you are using an unstable internet connection, have a large volume of data, or simply that you accidentally missed a step and are now facing technical issues.
Data transfer is crucial when upgrading to a new iPhone, and how long it takes depends on several factors. Sometimes it could take five annoyingly long hours to move content from your old iPhone to a new one.
But you don’t have to spend hours transferring data from your old to your new iPhone when there’s a faster way. In this article, I’ll discuss the factors that can slow down the data transfer process in your iPhone and how you can prevent it.
Contents
Why It Takes Long To Transfer Data To a New iPhone
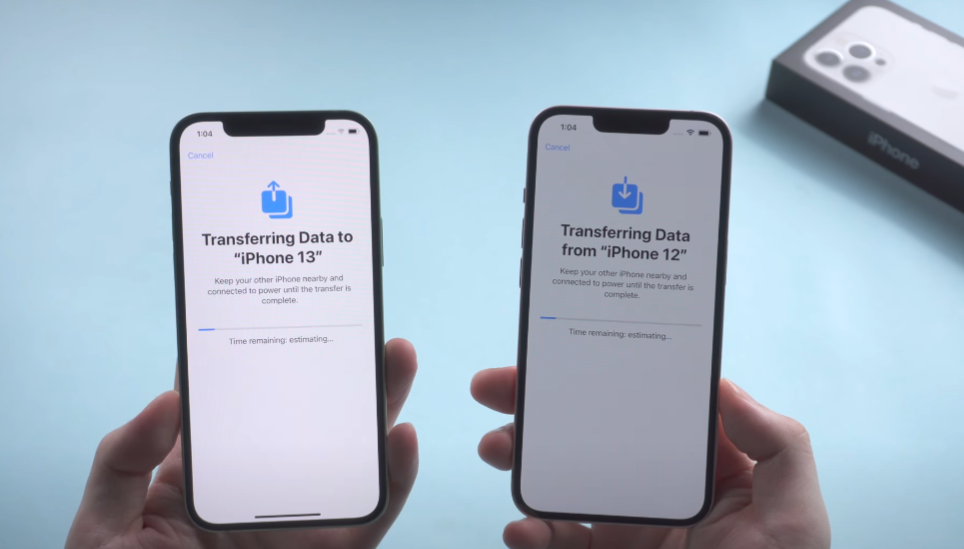
It’s quite common for users to face delays when moving data to their newly purchased iPhones. And there are quite a few reasons for this to happen.
Identifying the cause of data transfer delays will help you crack the riddle. Now, let’s see why people encounter this issue.
- Unstable Network: This is among the most common causes of delays when transferring data from one iPhone to another. Poor internet could impact connectivity and cause a delay during wireless transfers.
- Physical Distance: Physical proximity between the two iPhones could affect the transfer speed. Wireless transfers require both the receiver and the sender at close range. If you keep the devices far apart, chances are high that the process will be interrupted.
- Large Volume of Data: Transfers might take longer than expected when your old iPhone contains large files such as high-resolution images, videos, and large-sized apps.
- Software Incompatibility (Update disparities): Transferring files into your new iPhone may get interrupted or stop entirely if the old device lacks necessary updates. It can hinder the automatic transfer of applications into the new device since it would likely require the latest app updates.
Another thing that could impact the transfer time is the mode of transfer. If you’re using iCloud backup to transfer data, it should take at most 45 minutes to 1 hour to complete.
Now that you know the factors that could delay your data transfer process, let’s see how to speed it up.
How to Swiftly Transfer Data From Your Old iPhone To A New One
While surfing user complaints and recommended solutions, I saw users trying so many different fixes. According to one user, he spent nearly 7 hours stuck on the Face ID step. I can’t imagine how frustrated he must have felt!
He finally could complete the process after nearly 7 hours of being stuck on one step by restarting his phone. After rebooting the device, he chose the iCloud quick start option, which took just a few minutes to set up and complete.
Several other users also recommended transferring data from iCloud, as it is fast and transfers almost everything in no time.
However, the best way to transfer your previous content to a new iPhone is to use the Quick Start feature. How? Let’s find out.
Transferring Data To New iPhone Using Quick Start – Method 1
Quick Start helps you automatically set up your new iOS device using the previous iPhone. It typically takes several minutes to complete compared to the manual setup.
Here are the initial steps you need to follow before transferring the data.
- Turn ON your new iPhone and swipe up to start the initial setup.
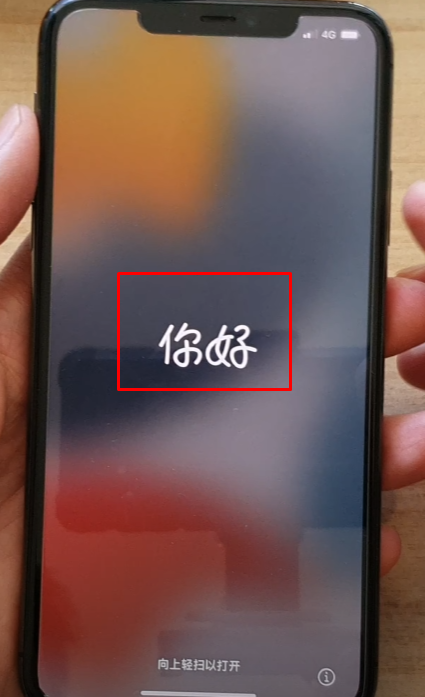
- Follow the on-screen instructions (language, region, etc) until you see the Quick Start screen.
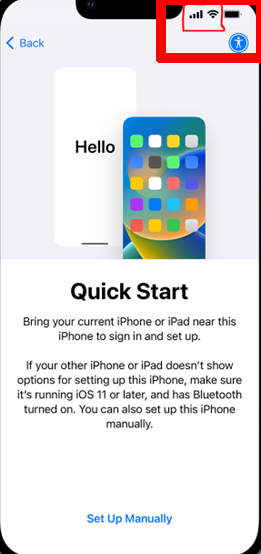
- You’ll see a prompt to set up the new device on your old iPhone.
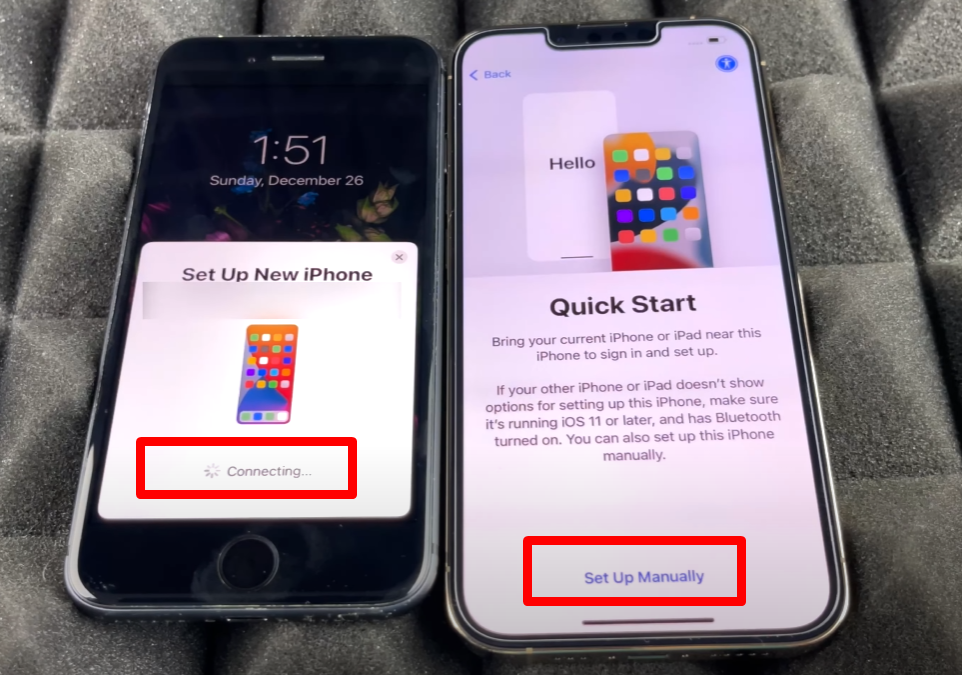
- Place/hold the old iPhone over the new one until the glowing animation displayed on the old iPhone appears within the circle.
- Wait till the circle turns green. When it does, continue the Quick Start process on your new iPhone.
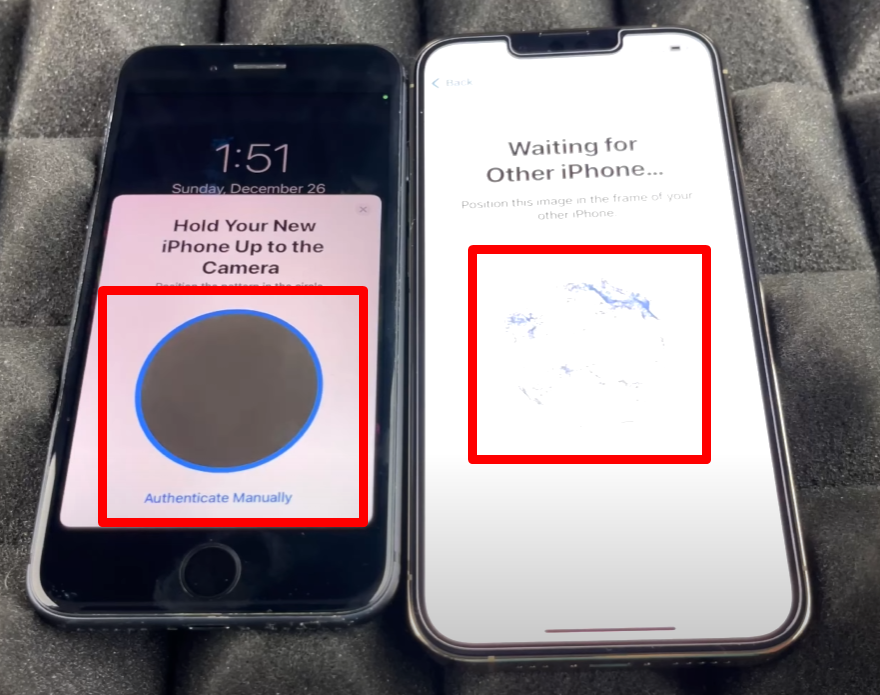
- Enter your old iPhone passcode and follow subsequent instructions to activate cellular service.
- You may need to update the software version. After that, your data begins to transfer.
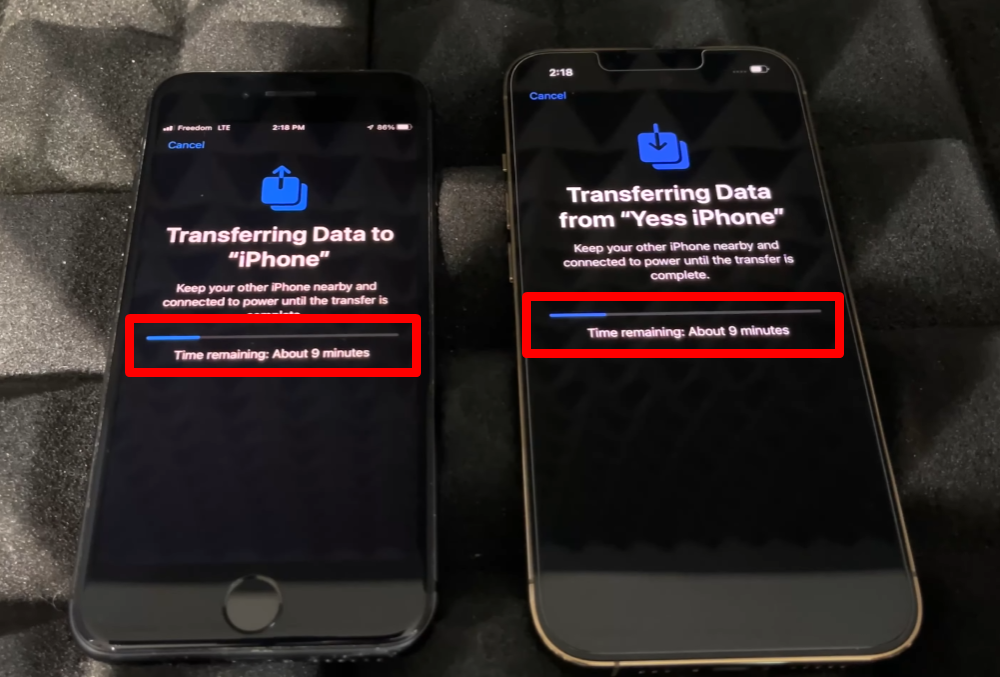
- Once transfer is complete, click on continue on your old device to finish transfer. Meanwhile, your new iPhone will restart, bringing to the “Hello” Screen.
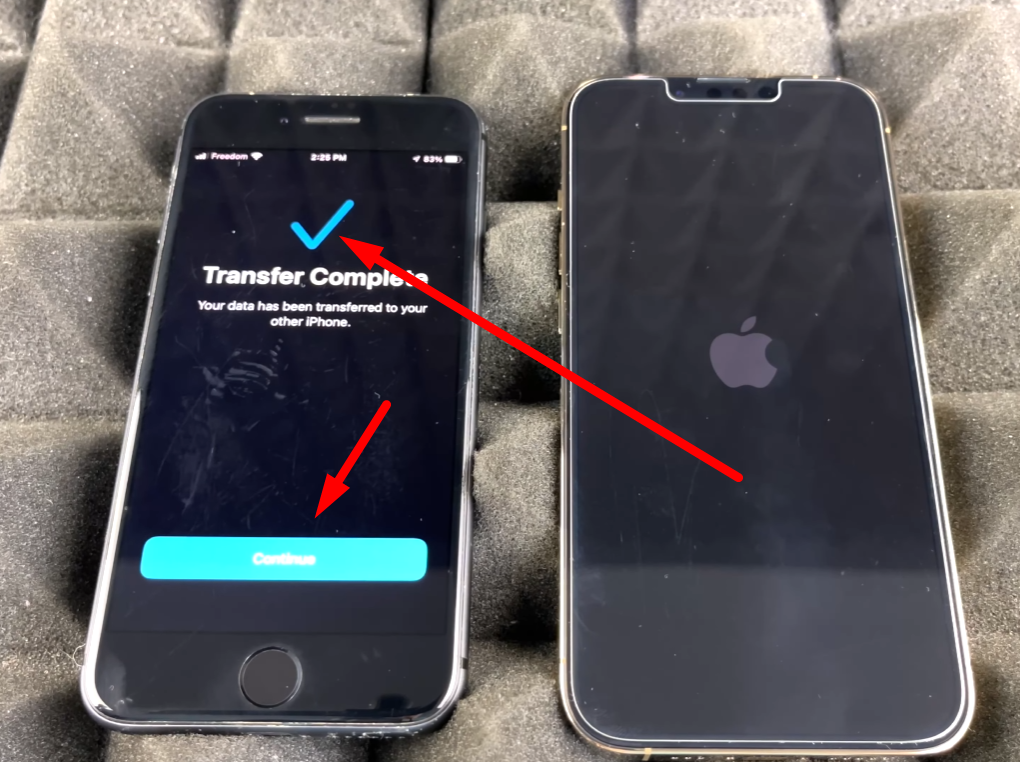
- Swipe up on your new device and follow the on-screen instructions. Enter your passcode and your data is successfully transferred to your new iPhone.
Transferring Your Data to the New iPhone Using iCloud Backup – Method 2
Assuming your old iPhone is not with you at the time of moving your data to the new one, iCloud backup method is a reliable alternative to consider. It’s a fast alternative to transfer apps and data to your new iPhone device with internet connection.
However, you must run a comprehensive device backup on your old iPhone before the process. This uploads every single content on your iPhone to your iCloud account. By accessing your iCould account on the new iPhone, you can now restore your contents with ease.
Here’s a step-by-step guide to assist you:
Step 1: Back up your contents on your old iPhone. Proceed to the next step if you have. Otherwise, do these:
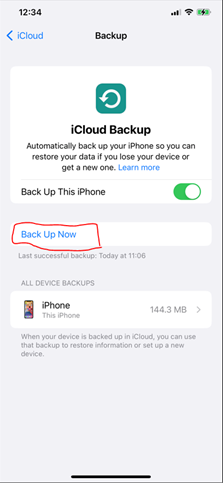
- Navigate to “iCloud” by clicking on your iCloud Account in Setting. Find the “Back Up Now” button and initiate content backup.
Step 2: On your new iPhone, follow the on-screen instructions after swiping up on the “Hello” Screen. Remember to connect to a Wi-Fi network when prompted.
Step 3: At the “Apps and Data” Screen, select the “Restore from iCloud Backup” option.
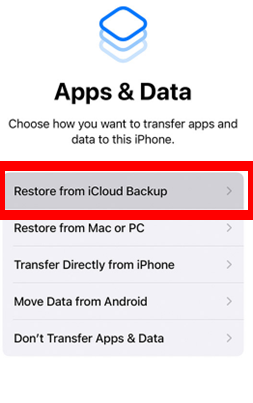
Step 4: Sign in to your iCloud account (same as the one in your old phone) and follow the subsequent steps.
Step 5: Make sure there is uninterruptible power supply and internet connection to avoid any breaches.
Step 6: Once the download is complete, your new iPhone will contain all the data from your old device.
Since you don’t need any authorization from your old device for this process, this is the easiest data transfer alternative. You can even do it without your old phone in sight. However, you must connect your device to a strong internet connection to speed up the process.
Initiating Data-transfer command on iPhone from Old to New iPhone
Initiating a data-transfer command from your previous iPhone to the new one is also another ideal alternative. However, you can only use both devices after the process is complete.
Also, ensure you keep both devices near each other and plugged into a power source until the migration process is complete.
Transfer time depends on your network conditions and the volume of data you’re transferring to the new iPhone. So, don’t worry about the transfer duration. However, ensure that both iPhones remain connected to Wi-Fi or cellular network during this process.
Here’s how to transfer data from old iPhone to a new one:
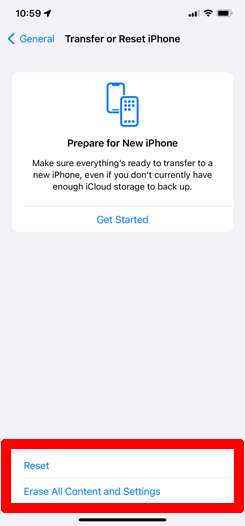
- Open settings on the old iPhone and navigate to “Transfer or Reset iPhone” in the “General” menu.
- Tap on “Get Started” twice to proceed.
- You will see a “This may take a few minutes” message and a new window.
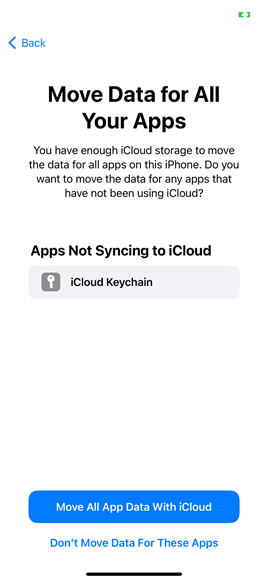
- Select “Move All App Data With iCloud” and Tap Continue to proceed.
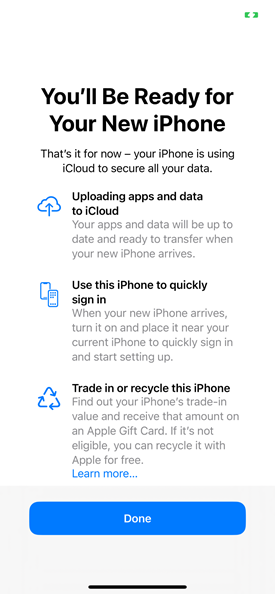
- Allow your device data to upload to iCloud and then select “Done”
- Once you sign into your iCloud on the new iPhone, it will automatically restore the backup, bringing in your data from the old iPhone to the new one.
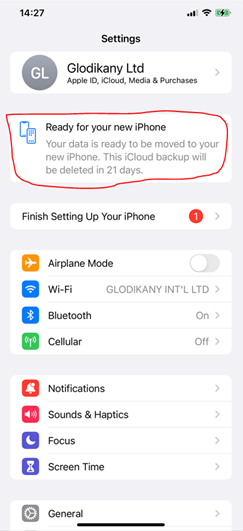
After 21 days, the iCloud backup will delete itself automatically. You don’t have to panic about data loss. You can always redo the backup again.
How To Transfer Data to New iPhone Using Transfer Software
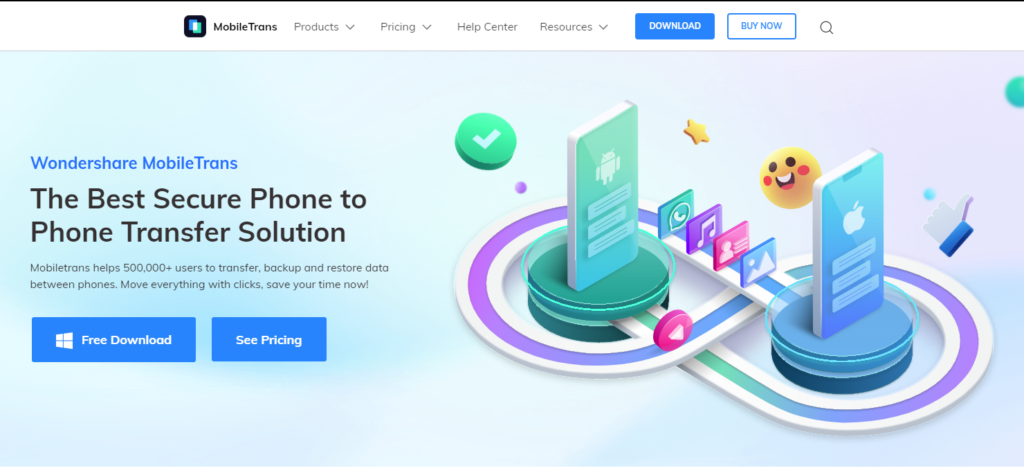
Besides the Apple official transfer methods we’ve discussed, some broad-spectrum data management applications are also available. These software allows you to transfer data to your new iPhone. One of the most-used broad-spectrum data management apps is MobileTrans.
MobileTrans uses AI technology to facilitate fast data transfer in iPhone and other mobile devices through a USB cable. One of the best features of this software is that you do not need to be tech-savvy to navigate its interface.
Here are the steps to transfer data to your new iPhone using MobileTrans:
- Install MobileTrans
software on your PC.
- Open the software, click the “Phone Transfer Module,” and “Select Phone to Phone” from the onscreen options.
- Connect both phones to the computer using USB cables.
- The MobileTrans software will automatically detect the phones, displaying one as the source and the other as the destination.
- If the detection is wrong, click the flip button to switch places between the two devices.
- Choose the data category from the list on the middle of the screen that you intend to copy to the new iPhone.
- Now click “Start” to begin the transfer.
- You must ensure the connection remains stable throughout the process. Do not shake the phones or the cables, as it might disrupt the transfer connection.
Other Ways of Transferring Data To a New iPhone
Another alternative to use when copying data to your new iPhone is restoring backup from iCloud, iTunes, or a personal computer. Let’s see how you can transfer your backup to your new iPhone using iTunes.
How to Transfer Backup Data Using iTunes to Your New iPhone Device
This method is the restore backup technique. Before you do this, ensure you backup your data on a PC or Mac.
Here are the steps to transfer data to your new iPhone using the iTunes method:
- Turn on your new iPhone and follow the prompt steps until you see the “Apps and Data” screen.
- Tap “Restore from Mac or PC” and continue.
- Connect your new iPhone to the PC where you backed up the old device.
- Open iTunes or a finder window on your computer and select your new device.
- Select “Restore Backup” and choose the latest backup to date. Do a quick review to ensure it’s the correct backup by checking the date and data size.
- You might receive a prompt to update to a newer iOS version when you click “Restore Backup.” If so, follow the steps to update to a new iOS version I’ll discuss in the next section.
- Enter your old iPhone passcode (on iTunes) if you’re restoring from an encrypted backup.
- Wait for the restore process to finish before completing the remaining setup steps on your iPhone.
Note: Keep your device connected to Wi-Fi and plugged into a power source after the setup. Doing this allows content such as music, photos, and apps stored in iCloud to automatically re-download into your iPhone.
How to Update to a Newer iOS Version When Restoring a Backup to a New iPhone
You might meet a hitch while restoring a backup to your new iPhone. It is often due to iOS update issues. In that case, the device will prompt you to update to a new iOS version. Here are the steps to follow.
- From the Apps & Data screen, tap Don’t Transfer Apps & Data and follow the remaining steps. You can skip the Face ID, Touch ID, and Passcode steps.
- After completing the setup process, update your device to the latest version of iOS.
- Allow the update to finish and restart the device.
- Erase your device by tapping Settings. Next, press General, and finally, press Transfer. You can also erase your device by tapping Reset, then Erase all content and Settings.
- After erasing the device, it will restart automatically, and a Hello Screen in the Setup Assistant will appear. Once the Hello Screen appears, you can resume your restore backup process.
One major disadvantage of restoring a backup with a computer is the loss of backed-up data.
Imagine a situation where some eventualities happened, and your computer got corrupted. You might lose part, if not all, of your backup data. That is why storing your data on iCloud is the best alternative for backing up your iPhone devices.
Conclusion
Setting up and transferring data to a new iPhone device could delay due to the transfer method, poor network connection, or technical issues. Most technical issues play out when you follow the manual setup method to restore the backup data.
However, official Apple-supported methods, like Quick Start, may deliver a faster transfer speed. In addition, ensure that you fully charge both devices or have up to 80% battery power before commencing the transfer process.
