When it comes to iPhones, forgetting the lock-screen passcode and getting the phone disabled is quite common among users. Apple recommends a restoration using iTunes and Mac to solve the issue. But the problem many people face is not being able to connect their iPhone to iTunes. So, what can you do then?
If your iPhone is not connecting to iTunes, try using a different USB port. Or, you can update your iTunes version. If it still doesn’t, try an alternative restoration method, like erasing the phone from iCloud or using third-party software (4uKey).
This article is a detailed discussion of all the methods we have mentioned above. Well, here’s what you should do if your iPhone is disabled and won’t connect to iTunes.
Contents
What To Do If Your iPhone Is Disabled?
You can take several initiatives if your iPhone is disabled. But knowing the reasons behind it, you can solve the disabled issue without facing any challenges. Let’s know why this happens and what you can do to fix it.
Why Is My iPhone Disabled?
The most probable reason behind this issue is typing the wrong passcode repeatedly. iPhones allow you to correct the passcode within 10 chances. If you miss it, the iPhone will lock itself.
For example, if you can’t put the right passcode within six attempts, the iPhone will be locked for 1 minute. As you reach the tenth wrong attempt, you can’t access the dial pad again for 1 hour straight.
Finally, if you can’t put the right passcode on your eleventh attempt, the iPhone will show you a disabled message and won’t offer further chances.
If you think closely, it is actually a good protection mechanism. In case you lost your phone, anyone else won’t be able to access your phone.
Here’s a chart of how long your phone will be locked after missed attempts.
| Number Of Attempts | Lock Time |
|---|---|
| 6 | 1 minute |
| 7 | 5 minute |
| 8 | 10 minute |
| 10 | 60 minute |
| More than 10 attempts | iPhone disabled |
Guess what? Sometimes it’s not even your fault. Almost every parent with a toddler has been in this horrific situation.
Your child tries to open the iPhone by putting in random passcodes. Sadly, after ten attempts, the iPhone assumes the worst. As a result, you see the notification, “iPhone is disabled.”
How Can I Fix It?
Luckily there are various ways to get your iPhone unlocked again. But keep in mind that the iPhone might erase most of your data if you haven’t backed them up through iCloud. This is to ensure that no third party can have access to your personal information. But it can backfire in this particular situation.
Now, if you have a proper backup, you can try the recovery method, connecting to iTunes, iCloud, etc. Don’t worry. We have described all of these methods in full detail with pictures below.
iPhone Is Disabled And Won’t Connect To iTunes – What Do You Do?
We can’t reject the possibility that iTunes will not show you a “Restore” message. Many people face this issue. So, in case you can’t complete the restoring process through iTunes, we have some alternatives to help you out. Have a look.
1. Use Another USB Port
A bad USB connection can be the main culprit. Since the whole process depends on a cable connection, we suggest you use the verified ones. Cables provided by the manufacturers work best for such troubleshooting.
Then, insert the cable into different ports. Sometimes a particular port might be damaged. Experiment a bit with the cable, and you might get the issue fixed.
2. Update The iTunes version
iTunes needs to be updated from time to time. If you don’t remember doing that, check whether any new update is available or not. if yes, update the iTunes. Now, try the restoring method again. This time, iTunes might not refuse the connection.
3. Use iCloud
A wonderful alternative to using iTunes is iCloud. Yes, it is a storage for your data. That means it also stores all your passwords. If you can erase the data altogether, the iPhone will provide easy access. Here’s the full process.
Step 1: Log-In
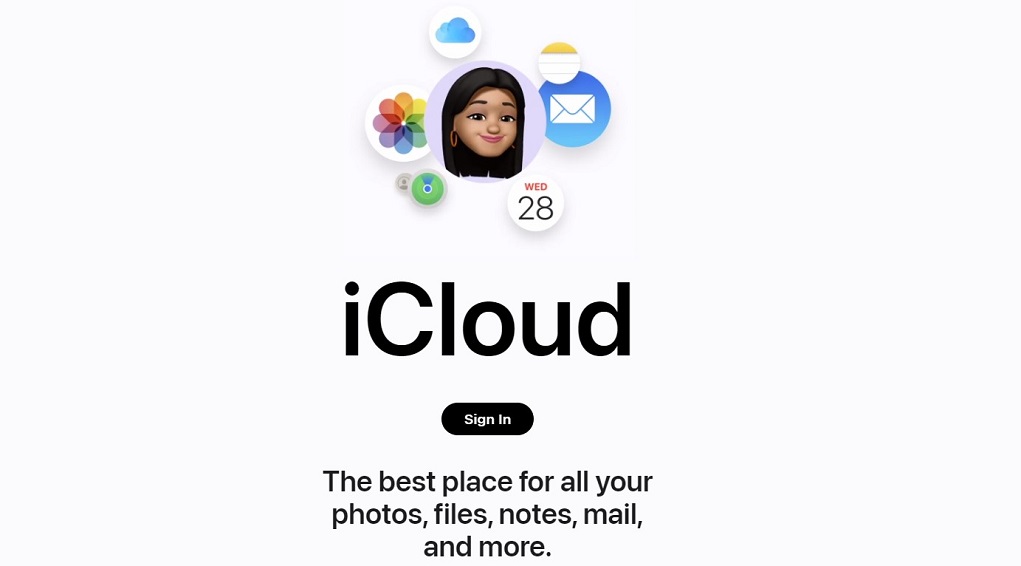
- First, enter the web browser on your computer and type www.icloud.com
.
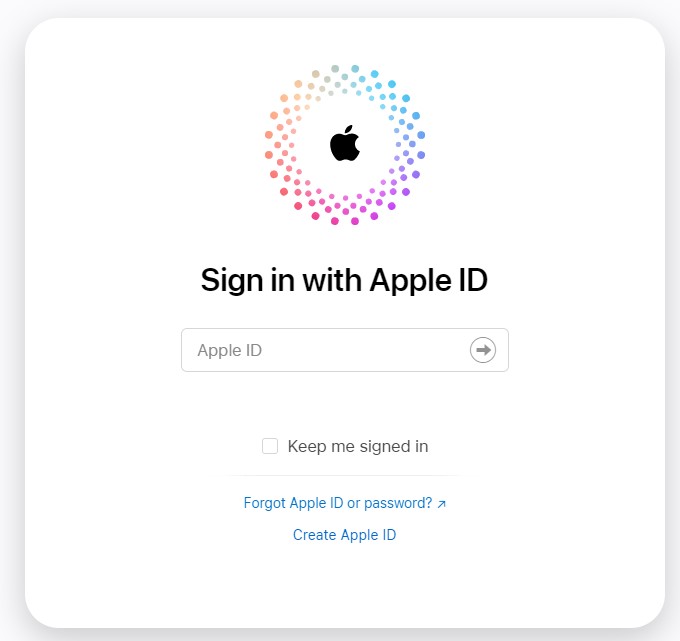
- Then, you have to put your Apple ID and password here.
Step 2: Choose Your Device
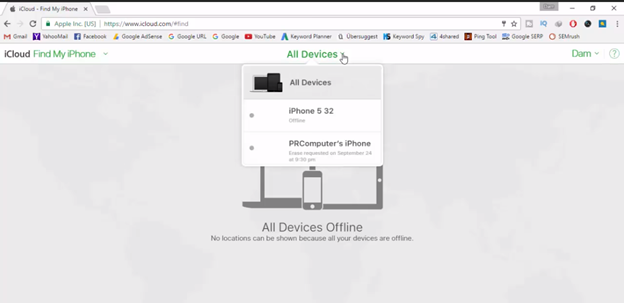
- Once you have entered the iCloud, select “find my iPhone.” Your iPhone must have an internet connection for this method to work.
- Next, click on “all devices” and select the disabled iPhone from the list.
Step 3: Erase the Phone
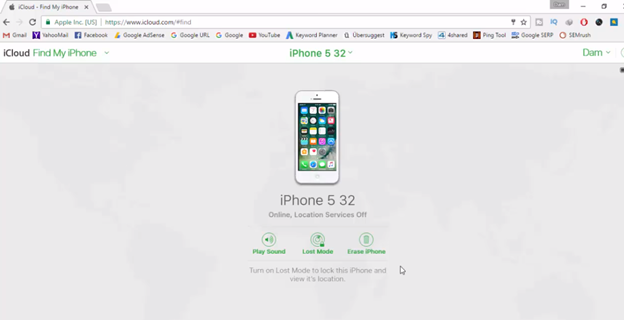
- Once you have located the iPhone, select it. Now, we will erase the data. Just choose the “erase phone” option.
- Another window will pop up for further confirmation. Just click “Yes.”
- After that, put in the password again that you previously used to enter iCloud.
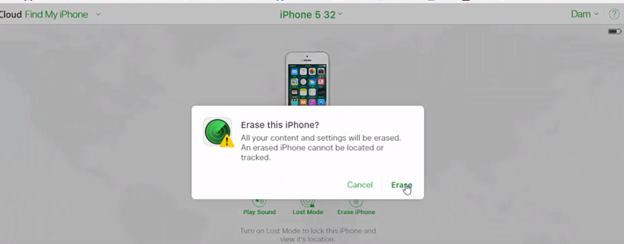
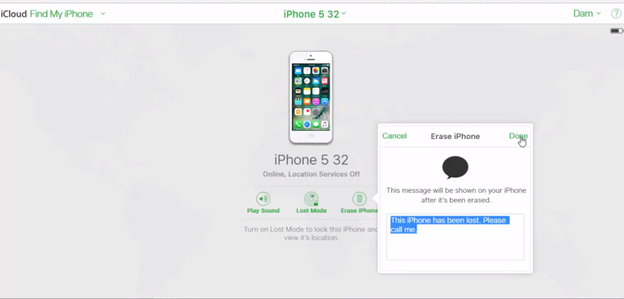
- Next up, type the disabled iPhone number and click “Erase.”
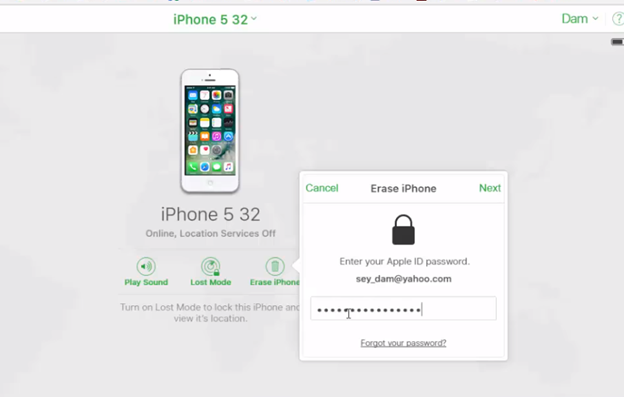
That’s it. Just wait for a few minutes and try to open your iPhone.
4. 4uKey Software
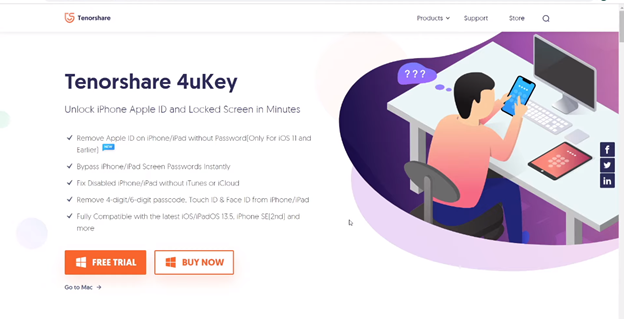
Finally, if you find the above methods difficult, we have software that can help. It’s called 4uKey. You will be surprised how easy it makes the whole un-disabling process. Plus, it works on every iPhone model. Check it out.
Step 1: Download It
- First, use your browser to search for the software “4uKey.” Then, download it
to your PC by clicking the “free trial” button.
- Once the download is complete, find the file in your download folder.
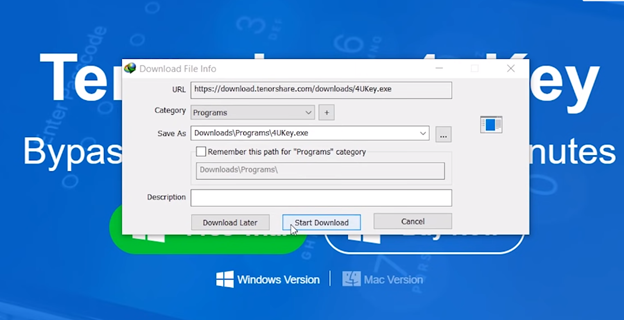
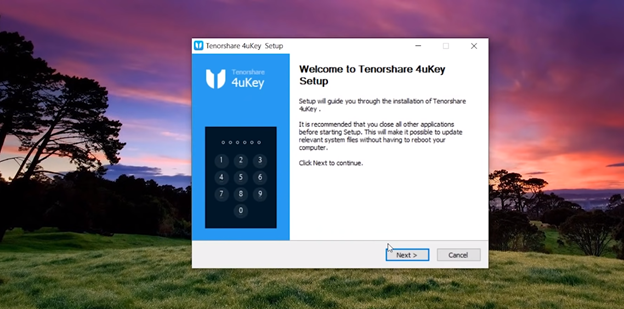
- Click on the file and select “install.” Follow the instructions on the screen till the installation is successful.
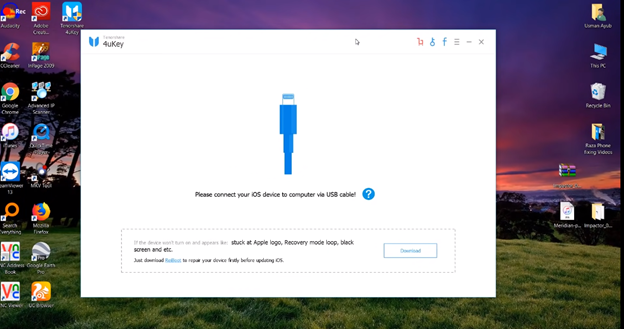
- Now, connect your iPhone to the PC through a USB cable.
Step 2: Download The Firmware Package
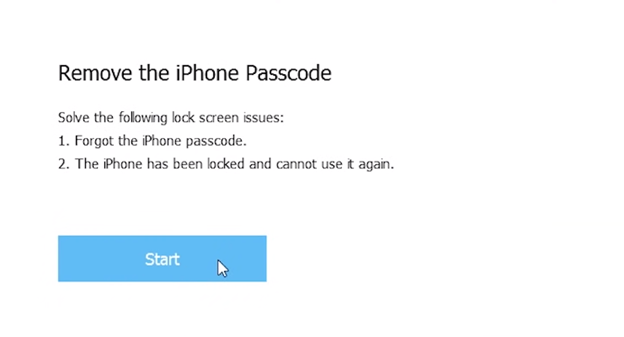
- Enter the software again. Do you see the “remove iPhone passcode” option? That means the connection is recognized. Press “start” to initiate the process.
- Next, you have to download the firmware package. You have to do nothing extra. Just click on the download button on the screen. And the package would start downloading.
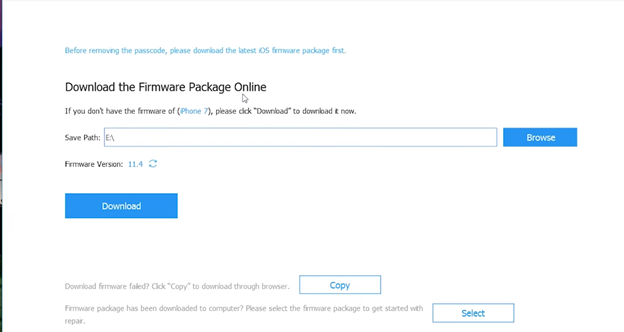
- It’s a big film. So, you might need to wait for 10 to 15 minutes. Try not to disconnect the cable during this time.

Step 3: Initiate Unlocking
- After the download is over, press the “start unlocking” button. If the iTunes interface pops up during the process, close that window.
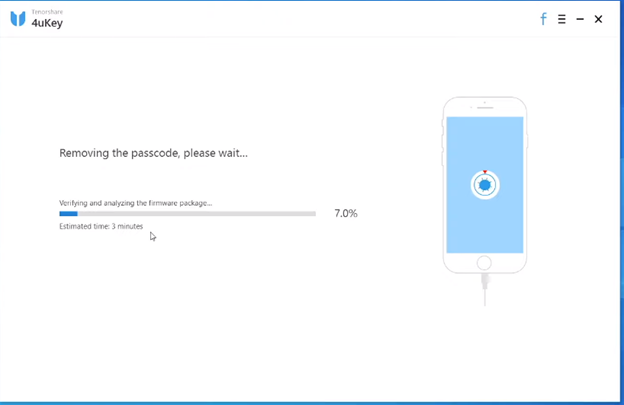
- The unlocking process needs another ten minutes. The software is running a flash right now on your iPhone.
Congratulations! The iPhone has been restored. You can close the application if you want. Go back to the iPhone and try to operate it. Hopefully, you will find no more trouble.
Note: It is a paid method. You have to register and provide a fee. We would recommend you try the free methods we mentioned above.
How To Connect Your iPhone To iTunes The Right Way?
Connecting your iPhone to iTunes is the most effective & popular way to unlock it. But you will need access to a PC or MAC to accomplish it. Here are the steps you need to follow.
Step 1: Download iTunes
As you can already guess, the very first step is to download iTunes. If you are a MAC user, you can easily skip this step. Because MAC already comes with a preinstalled iTunes.
But, if you use Windows, Go to your web browser (on the pc) and search for “download iTunes.” Download iTunes from Apple’s official website.
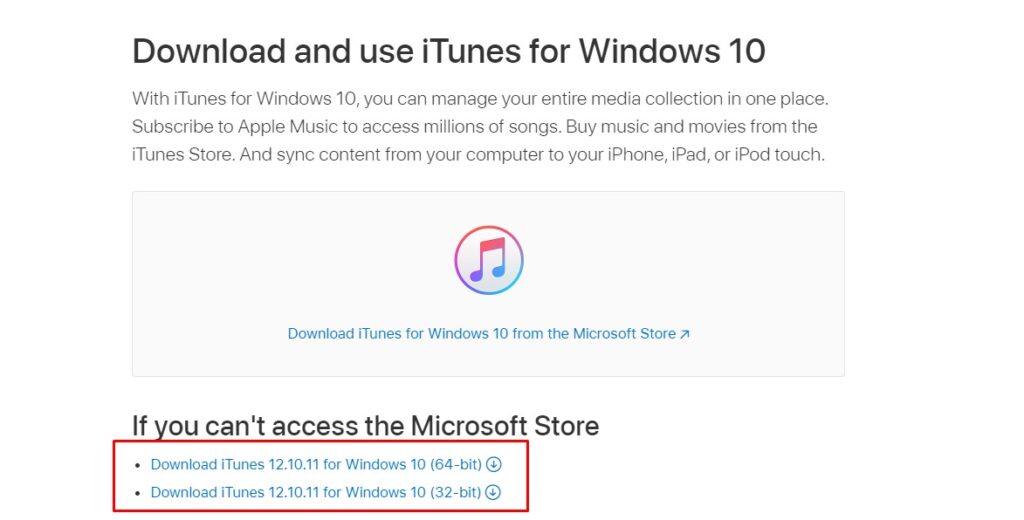
Once the download is finished, just find the application and open it.
Finally, grab a USB cable and insert one end into your PC and the other one into your iPhone.
Step 2: Enable Recovery Mode
To enter recovery mode successfully, the iPhone must be turned off. The process can be a bit different for each model.
I. For example, if you use iPhone 5, 5c, or 5s, hold the top and home buttons together.

First, you will notice the apple logo appears, and the screen turns black. Then, release the power button. But keep your hold on the home button. Soon, the screen will light up again, and you can see the iPhone has connected to iTunes. It will look like this.
II. For iPhone 6 and SE (first generation) series, hold the side button and the home button together.
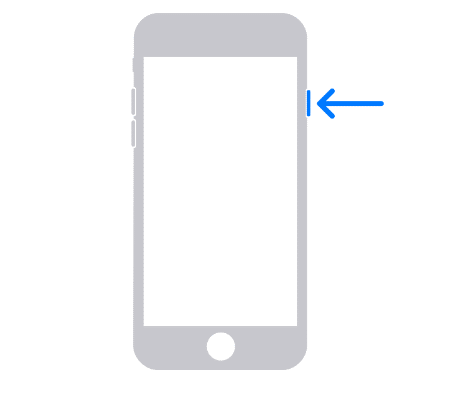
III. For iPhone 8 and later models, press the volume up button and release it. Then press the volume down button and release it.
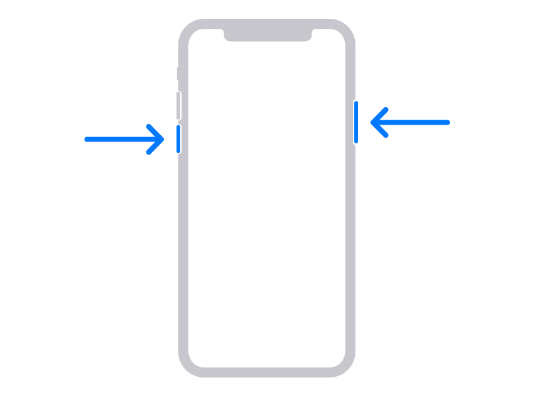
Finally, press and hold the side button until you enter recovery mode.
Step 3: Restore the iPhone to the Factory Setting
Now check the Laptop or PC screen. Surely, there will be a notification. So, go on and click on “Restore iPhone.”
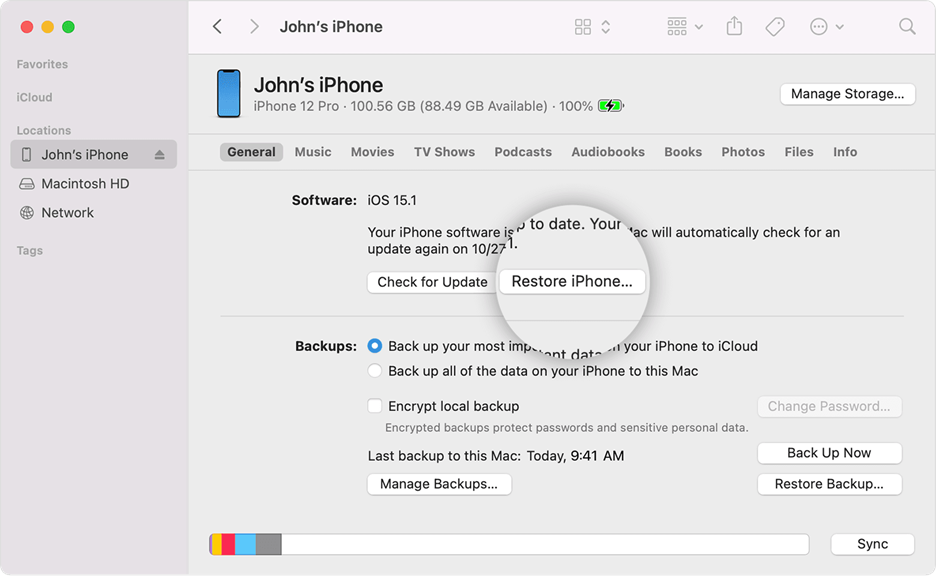
- Next, select “Restore”. Keep in mind that restoring the phone will erase all content and settings back to the factory version.
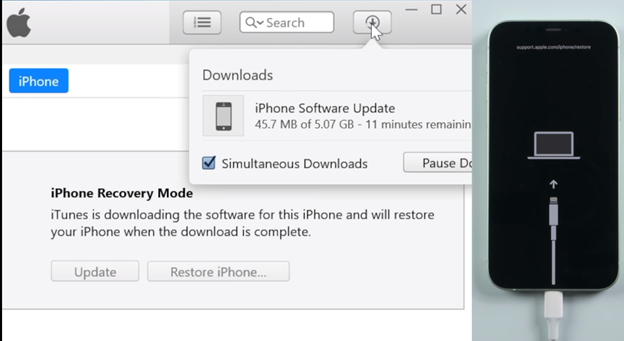
- Agree to the terms and conditions. This will automatically download software.
Step 4: Extract The Software
Go back to your iPhone and follow the method for entering recovery mode again. Press the home and power buttons together until you see the Apple logo. Then, leave the power button and keep pressing the home button for ten more seconds. Soon, you can see the recovery logo again.
- You will get a pop-up on your computer again. Click on “Update.”
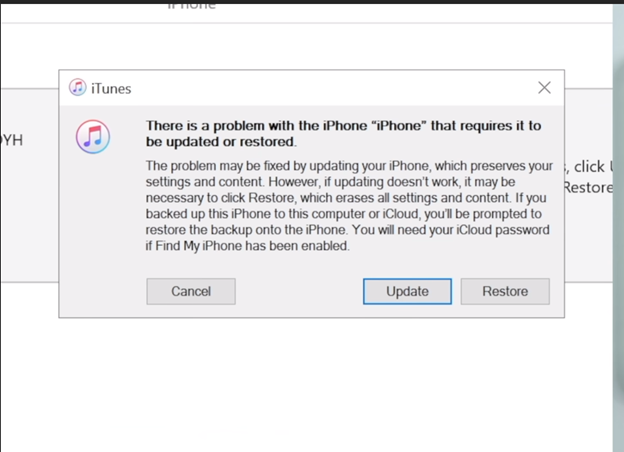
- Then, select “Restore and Update.”
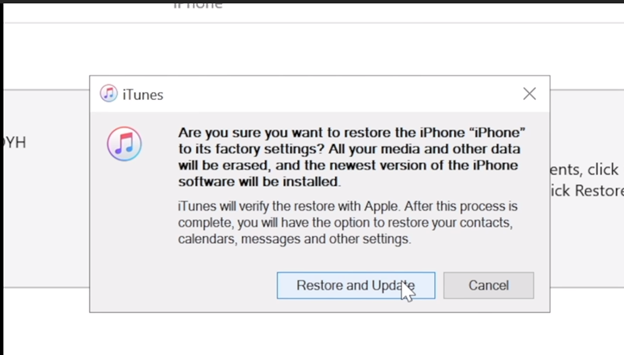
- As soon as you do that, the software you downloaded earlier will start extracting.
Step 5: Check Your iPhone
Wait for a while, and your iPhone will restart automatically. If it’s not restarting, check whether the USB cable connection is secure or not. While doing the process, you might get a pop-up saying “Activation Lock.” Simply put your apple ID and password to erase this notification.
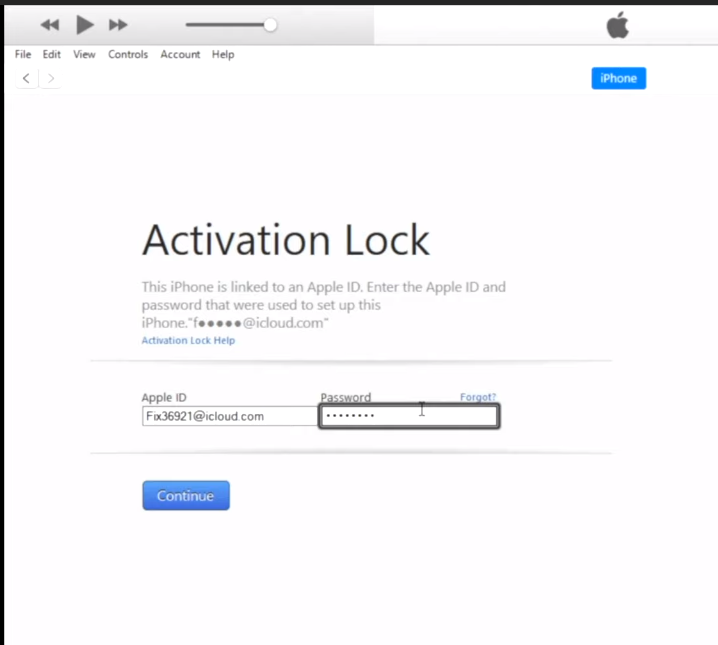
Finally, check whether the iPhone is working properly or not. If you have followed the instructions correctly, there should be no more trouble.
Note: You need at least 50% battery charge on your iPhone before trying this method. If you suspect the charge is not enough, keep the iPhone connected to the computer. The computer will charge the device.
3 Tips To Avoid Disabling Your iPhone
After restoring the iPhone, your main focus should be to avoid such incidents in the future. For that, you can take certain precautions. Such as
1. Remember Password
We suggest you use a strong and easy-to-remember password. Then, please write it down in a note. Even though you are sure about not forgetting it, you can’t be too sure. And physical/ tangible notes are safer than virtual ones.
2. Face Recognition/ Fingerprint
We think it’s a wonderful idea to enable face recognition on your iPhone. That way, even if you forget the passcode, you have another option to rely upon.
3. iCloud Backup
Even if you successfully restore the iPhone, there are chances of data loss. That’s why it is wise to store important data in iCloud storage. That will bring you peace of mind during the troubleshooting process.
Frequently Asked Questions
Do you have more queries? If yes, then you must check out our special FAQ section. We have answered two most asked questions on the web regarding this issue.
Is there a way to unlock a disabled iPhone without restoring it?
Yes, there is a way to unlock a disabled iPhone without restoring it. And we have already described the process above-4uKey software. It is a third-party application designed to help you erase a password if you have forgotten it or simply just selling it.
All you have to do is enter the software > Connect your PC to the iPhone> Download the Firmware Package> Start Unlocking and wait. But keep in mind that the software is not free.
How Can I Unlock A Disabled iPhone Without Losing Any Data?
iTunes and iCloud are the most effective methods for restoring a disabled iPhone. Nonetheless, you will lose data during the process. To avoid this, turn on the iCloud backup option.
Just go to Settings > iCloud Storage > Turn On Backup. That’s it. This simple step protects your data. Even after restoration, you can go to iCloud storage and find everything perfectly stored.
Conclusion
We are at the bottom of this discussion. Before leaving, we want to remind you again how important it is to back up your data. Without a backup, you can’t save those memories from the reset.
As for the method, we recommend iTunes first. Apple also prefers it over any other bypassing passcode method. Nonetheless, we have shown other techniques as well. So that you don’t have to look anywhere else.
Hopefully, you have figured out how to do it. Just follow the instructions, and we believe you can do it.
