Are you tired of seeing the letters on your iPhone contact rather than any photos? Well, this is pretty common to see just acronyms and if you are nitpicky about it, then this article will guide you to get FB photos on your contact. So, how to get Facebook photos on iPhone contacts?
You can import Facebook photos on iPhone contacts either via an app such as SyncMe or by allowing permission from iPhone account settings. Both ways are known to work just fine, but sometimes updates from Apple can be concerning. We prefer the sync me or the face sync app.
In this article, we will talk about each functional method to make Facebook photos appear in your contact. Keep on reading to discover.
Contents
What Is SyncMe? Why Should You Use it?
SyncMe is a contact sync app for android and iPhone users that helps to sync saved contact info and photos in your photos in a flash. This is a caller id that helps you to discover the person calling you when it is synced to Facebook and your device.

Not to mention it has numerous beneficial features like contact backup, favorite list, call recorder, etc.
Get Facebook Photos On iPhone Contacts In These 2 Simple Ways!
Getting Facebook photos on iPhone Contacts lets you pick who you want to call more easily. Besides, third-party apps like SyncMe automatically update the contact details if the users change it on any social media platform.
In this section, I’ll discuss two ways you can sync Facebook contact details to your iPhone Contacts. Keep reading to find out more.
Sync Using Device Settings – A Simpler Method That Can Work
If you are lucky enough your apps have a built-in setting that can allow contact syncing in a go. This process can be a lifesaver and if it works, you might not need to install any third-party apps as we mentioned in our previous method.
Here is what you need to do serially.
- Step 1: You need the Facebook app installed on your device.
- Step 2: Launch the FB app and sign in using your username and password.
- Step 3: Don’t sign out, just jump out from the application and go to phone settings.
- Step 4: Scroll down and find the Facebook option. After clicking on Facebook you might be prompted to sign in. Use the username and password in this case.
- Step 5: Then you will see a tab appearing asking you to permit apps like calendar, contacts, Facebook, etc.
- Step 6: Make sure the ‘contacts’ bar is turned on.
- Step 7: Now you will need to update all contacts. Just press the update button and you are good to go.
- Step 8: When the update is done, go to your phone’s contact application and your list should highlight facebook contacts for those who are connected to you on the social media platform.
Note: This process applies only for devices running an older version of Facebook as well as the iOS version. If you don’t find the Facebook option in the settings, you will have to follow the first method we talked about, which is using the SyncMe app.
How To Use SyncMe To Get Facebook Photos On iPhone contacts
Want to see profile images of your contacts? Don’t worry, it’s possible if you have the SyncMe app. It is very convenient and works like magic. All you need to do is install and follow some basics to incorporate photos into contacts. Let’s see how it is done.
Step 1: Download The App
Manually syncing photos via android settings might not work all the time, but the SyncMe app does the job very well. Download the iPhone version from the app store.

Step 2: Launch And Work The Settings
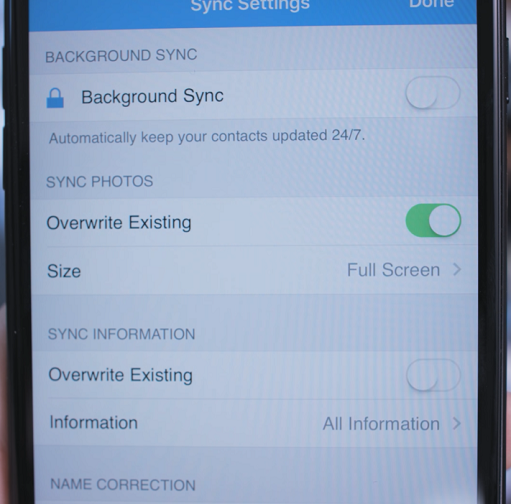
Now that you’ve downloaded the app, launch it and locate the sync settings. Once you are there you will have to provide details about what you want to synchronize. First, go to the ‘sync photo’ option and turn on the ‘Overwrite existing’. You might want to select the photo size as well.
Now Go to the information tab and put in the criteria that you want to see. In this case, you can just mark all the options such as email, bday, website, current address, etc.

Step 3: Time To Sync
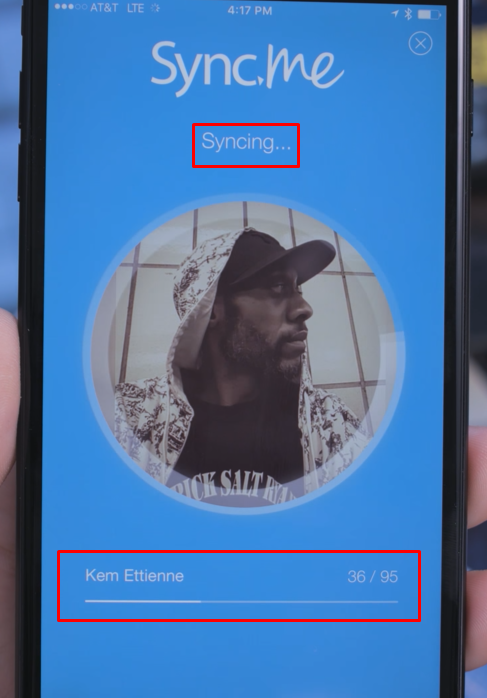
When all the parameters are set, you just need to press done and go back to the home screen. There is a round sync button in the middle. Click on it and the app will be in work.
In between the progress, there will be a prompt asking you to select the social media platform. Press on ‘Facebook’ and select next. Now in seconds, the app will be showing contacts with Facebook info.

Press next to proceed. Here a page will pop up showing contacts that are missing photos because you are probably not friends with these contacts on any social media.

Step 4: Check Your Contacts
If you’ve followed till step 3, everything should be working just fine. Go to your contacts and see the changes. Now the contacts should exhibit profile images. This is what you were looking for right?
Conclusion
It can be hard to identify a contact just by their names and you might have tons of unidentified listings in your directory. Won’t it be easier if the profiles had photos? You can try out adding images to each contact, but that is going to be very time-consuming.
Now you might be wondering, how to get Facebook photos on iPhone contacts. Well, it’s pretty simple, just get the SyncMe application. It is the most used and reliable option out there. Most importantly the app is free and will give you a top-notch caller id service.
The next time someone calls you, you will be seeing their actual linked photo rather than just the name.
