To add a contact group in your iPhone, First, log in to your iCloud account, tap on contacts app, and click on the plus icon. Select the new group option, type the name of the group. Then go to the contacts again, drag the contacts and drop in your group and start sending group mail.
Creating contact groups on your iPhone makes your professional or personal communication easier than ever! You can send group text messages or emails to your friends, family members, and coworkers.
You can organize contacts on your iPhone with group contacts. Moreover, it makes your everyday business more cost-effective and time-bound to disseminate the same message or mail to multiple people.
In today’s writing, you will learn the lessons to create group contacts on iPhone for email and text messages. Moreover, I will show you how to delete the contacts group when needed.
So, no more words! Let’s have a deep dive here.
Contents
- How to Add Contact Groups on an iPhone for Emailing with iCloud?
- How to Create Contact Groups on an iPhone for Emailing without iCloud?
- How to Add a Contact Group on iPhone for Texting?
- How to Delete Contact Groups on iPhone?
- Benefits of Adding Contact Groups on iPhone!
- FAQs for More Information!
- Conclusion
How to Add Contact Groups on an iPhone for Emailing with iCloud?
You can create a contact group on your iPhone using an iCloud account to simultaneously send mail to multiple people. Once you make a contact group on your computer, it will automatically come to your iPhone. Let’s see how to add a contact group using an iCloud account.
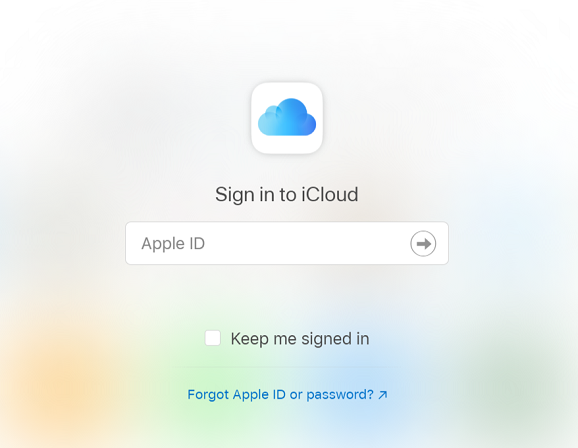
- Login to your iCloud account if you are using a windows PC.
- Go to the Contacts app.

- Tap All Contacts shown on the top-left screen

- Click on the (+) plus icon on the screen.
- Tap the New Group
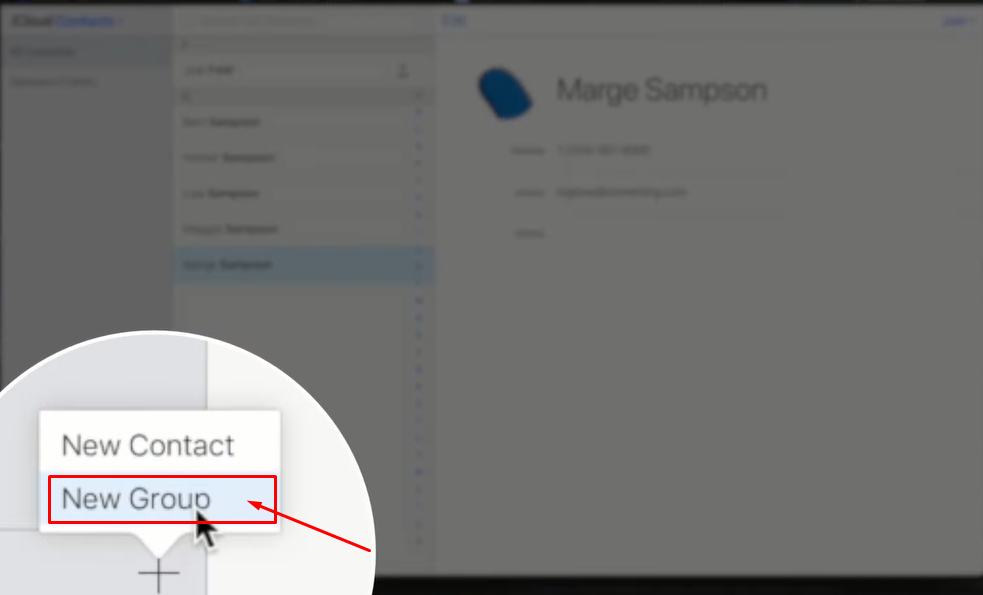
- Give a title of the untitled group
- Go to the All Contacts again to see your all-available contacts.
- Drag the contacts and drop on the contact group you created.
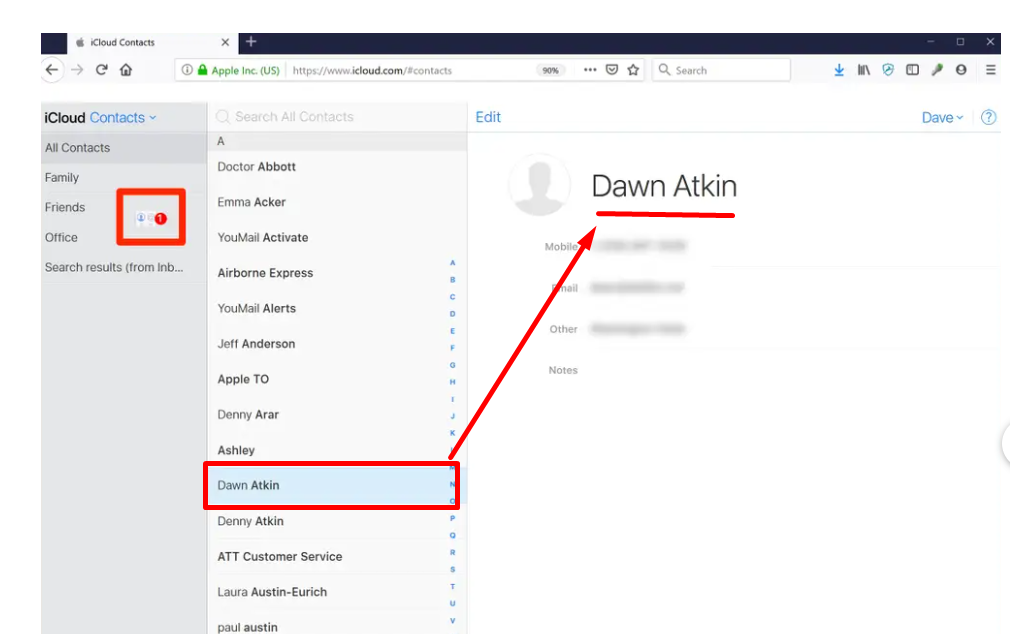
- Click on the group and make sure the contacts are added properly.
Note: You must add all the contacts with email addresses when creating the contact group for emailing. Otherwise, you won’t get the email addresses on the recipient column of your mailing interface.
How to Create Contact Groups on an iPhone for Emailing without iCloud?
You can create an emailing contact group on your iPhone, even if you have no iCloud account. Here is the process step-by-step.
- Tap the phone app or contacts app and go to the contacts list in the upper left corner.
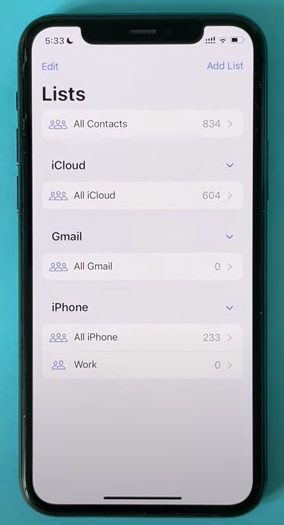
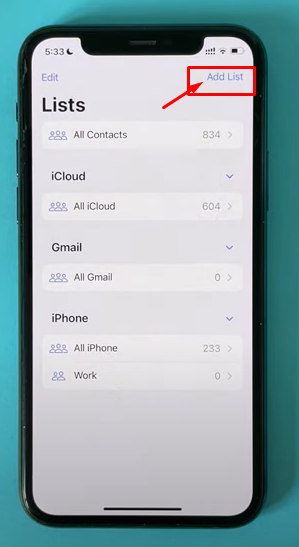
- Click on the add list icon to create a new email group.
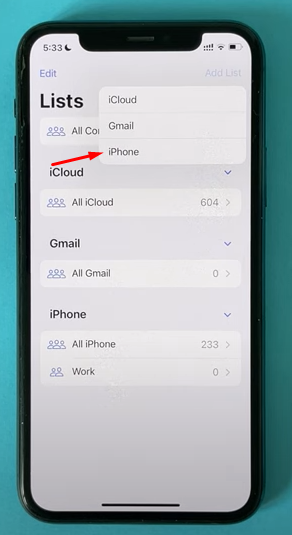
- Give a name of the contact group.
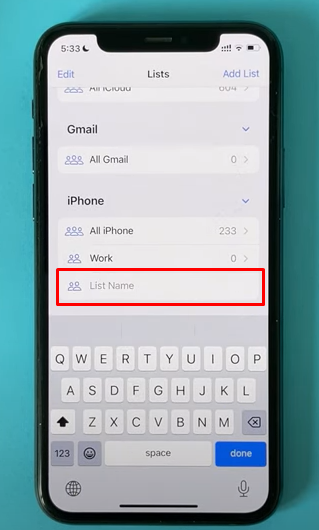
- Open the new list to add contacts.
- Tap on the plus icon on the top right corner.
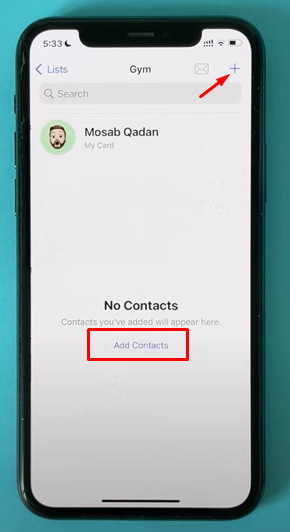
- Select each contact to add to your contact group.
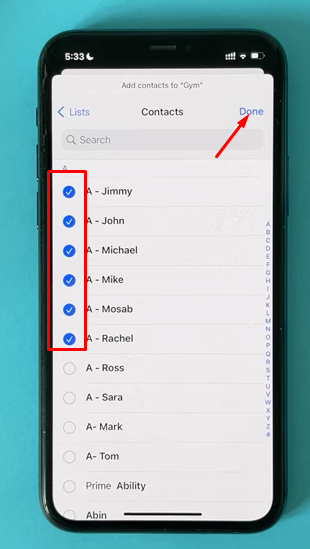
- Click done and start sending mails to your preferred group members together.
How to Add a Contact Group on iPhone for Texting?
Stay connected with your friends and family 24/7 on a contact group for Texting. You can share group iMessage, MMS, and SMS on the contact group based on network, settings, and carrier plan. Let’s see how to add and enable a contact group on iPhone for Texting.
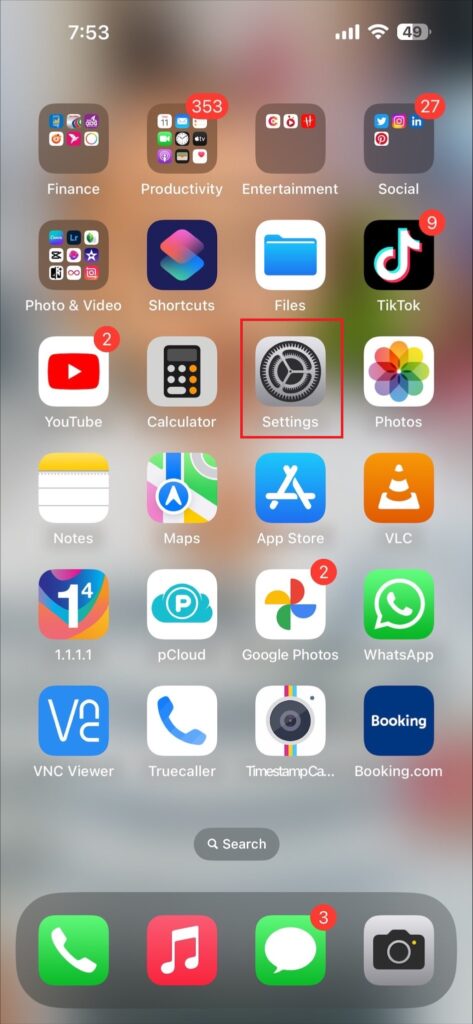
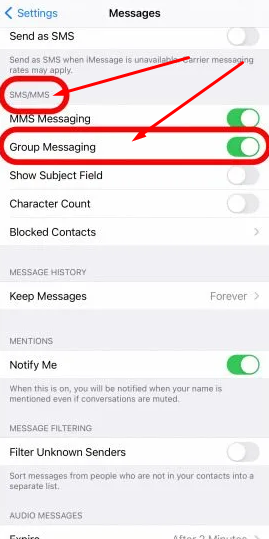
- Go to the settings of your iPhone first to enable group messaging.
- Scroll down and select the message from the menus.
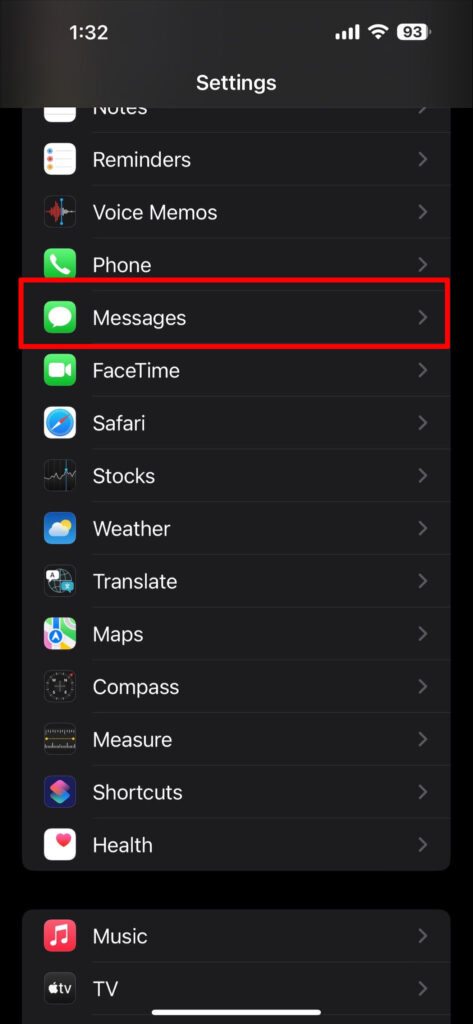
- Switch on the group messaging option.
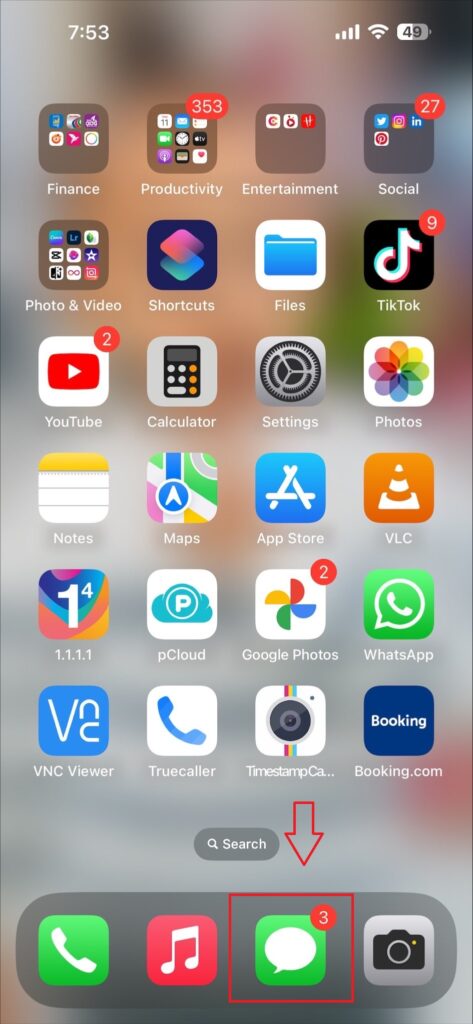
- Open the messaging app on your iPhone.
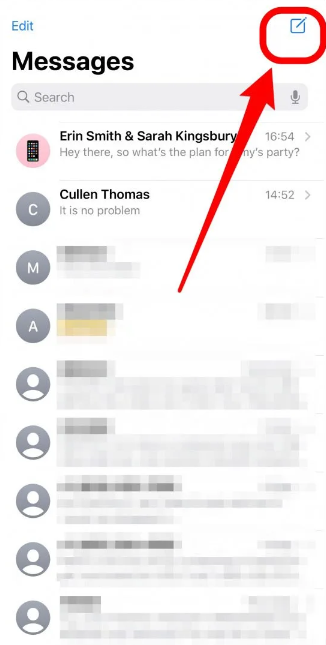
- Click on the compose icon on the top-right corner of your iPhone.
- Add that contact name in the ‘To’ field. Tap the + icon to see the contacts that you want to add.
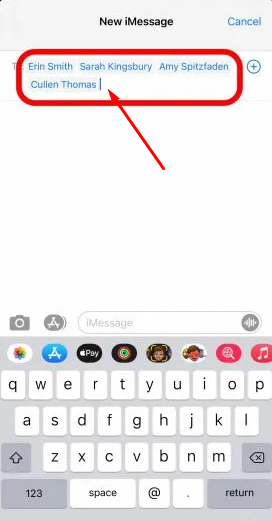
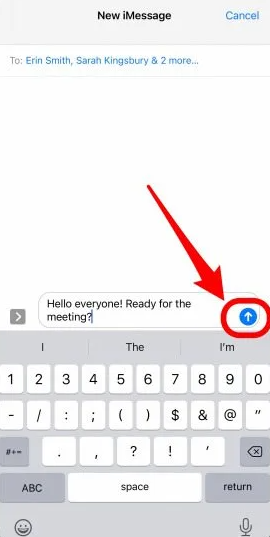
- Type the message and send it to start group texting with all members
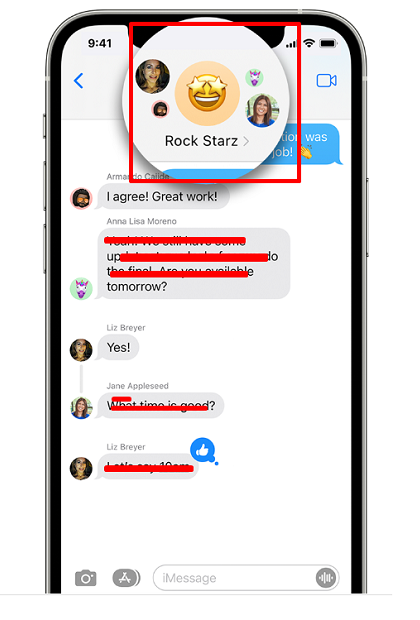
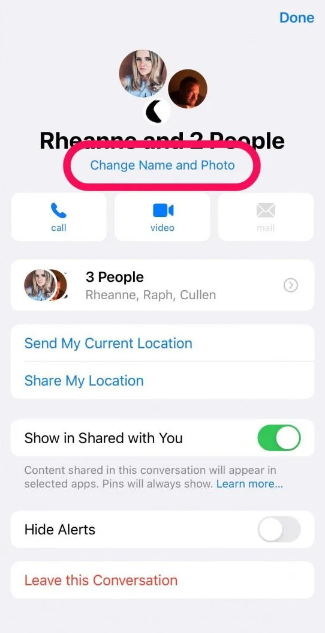
- Give a group name to send the message by the group name each time later.
Note: All the members of the contact group must have an iOS device to do group chats, texts, SMS, MMS, and iMessage with each other.
How to Delete Contact Groups on iPhone?
By logging into your iCloud account, you can delete any contact group on your iPhone. Deleting a group doesn’t mean removing particular contact from the All Contacts. Here is how to delete a contact group from an iPhone.
- Sign in to your iCloud account.
- Go to All Contacts on the main iCloud menu.
- Select the group that you want to delete.
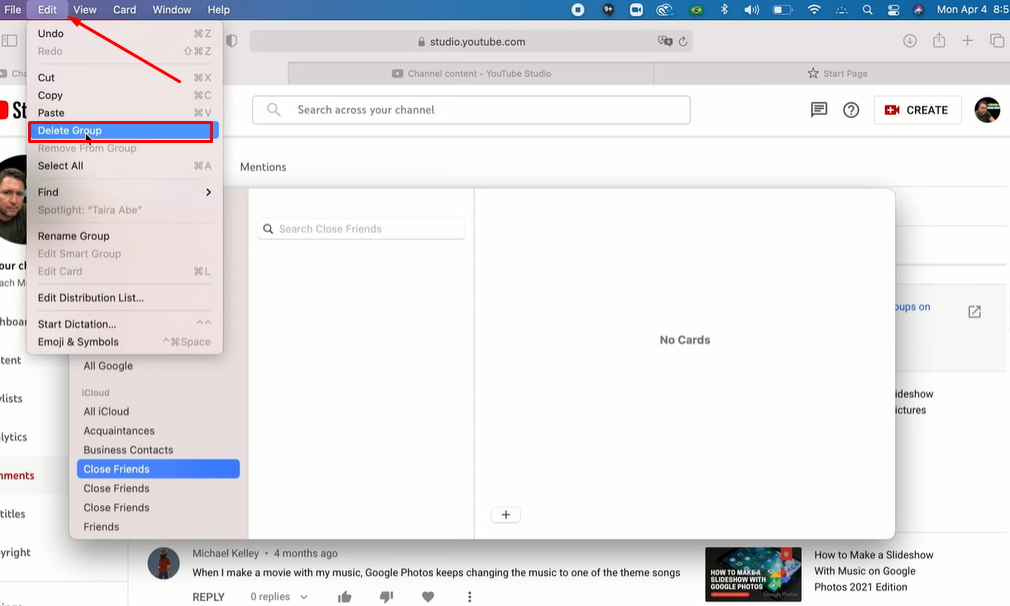
- Tap the Delete key on your keyboard.
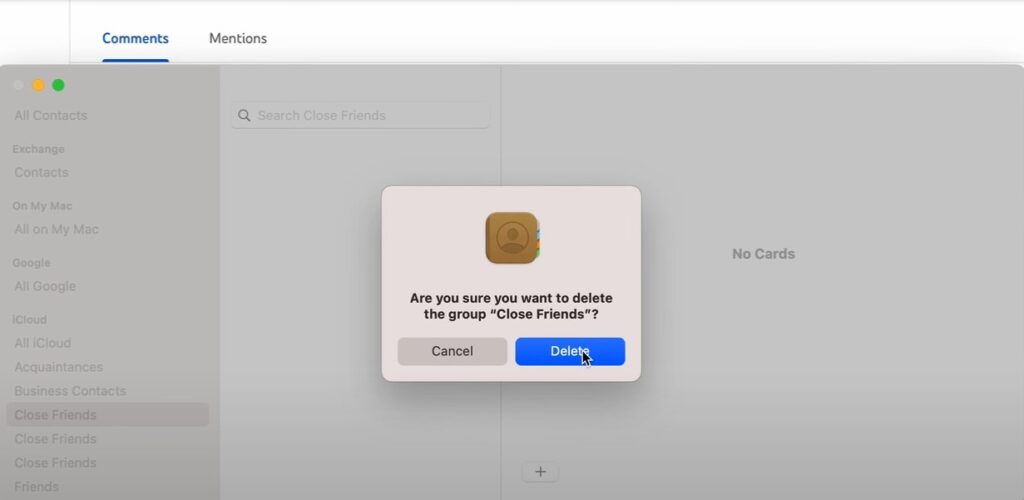
- A confirmation popup will appear to delete.
- Just tap ‘delete’ to remove the contact group from our iPhone.
Note: All messages, texts, and SMS will no longer be available if you delete the contact group once. However, the contacts will remain in the All-Contacts group on your iPhone.
Benefits of Adding Contact Groups on iPhone!
Creating contact groups is an amazing iOS feature for family sharing and professional interactions. It lessens gross chatting hours and business efforts to communicate with more people within less time.
Mailing to Multiple People:
With contact groups, you can send mail to multiple people at once. It lets you add your desired people to the same group with their email IDs and send them the same mail together. Therefore, you can save time by sending mail to multiple people.
Texting Together:
Making contact groups with friends and family lets you share messages at all times. It works great for party invitations, group discussions, and trip plans for an outing at the weekend.
Faster Interaction:
You can reach more people within less time with contact groups on your iPhone. Therefore, it lets you care for the added guys to the groups with faster communication and interaction.
FAQs for More Information!
If you are new at creating contact groups on your iPhone for Texting or mailing, you may have more to learn about managing the groups. Here is something more to learn to make a group effective enough.
How to Add a Name to The Contact Text Group on iPhone?
You can name your contact text group to manage the group activities properly and quickly. However, you need conversations with two more persons to name the group. Let’s see how to name a text group.
- Tap your group icon at the top of the message thread.
- Add or change the name of the group.
Therefore, you will find your group by the particular name to converse with the group members. However, every member must use iOS devices like iPhones, iPads, and iPod Touch.
How Can I Change the Picture to The Contact Text Group on My iPhone?
You can change your contact text group image with captured or stock images on your iPhone. It helps you to find your group among others. Here are a few steps ahead to change the group text picture.
- Click on the change name and photo under the group icon.
- Tap the camera or select an image from the gallery on your iPhone.
- Finally, click on the Done icon on the top-left icon.
Moreover, you can add emojis to the group photo to make it more attractive and meaningful.
Conclusion
Create a contact group for Texting or emailing on your iPhone to make everyday conversation easier. It lets you share a message with multiple people within the quickest time.
A contact group for mailing helps manage the bulk of business emails with different persons at a time. It saves business hours and efforts to contact multiple stakeholders with the same message.
However, it is easy to delete a contact group anytime with no issues. So, why are you not in a contact group for mailing or messaging with your friends and family members? It looks amazing for sharing and caring.
