From making cute cat videos viral to organizing mass community events, Facebook has undoubtedly made its mark as a pioneer of social media platforms. But, with great power comes great responsibilities, and in recent times, Facebook messed up on keeping its oath to protect user data.
Are you considering cutting ties with Facebook for its lack of data privacy? Or do you want to take a break from social media for a few days?
A 2018 survey found that around 8% of the total respondents deleted their accounts following the congressional testimony from Mark Zuckerberg. Now, deleting your Facebook account is one way to ensure your personal data stays safe, but there may be better alternatives like deactivating the account for a certain period.
In this article, I’ll walk you through the complete process of deleting a Facebook account on an iPhone from scratch. However, you’ll also get to discover the downsides of deleting a profile and the alternatives you can try.
Contents
What Happens When You Delete Your Facebook Account?
Being a Facebook user myself for the last 14 years, I know firsthand the incredible impact social media can have on our lives. And saying goodbye to all the connections you’ve built over time doesn’t exactly sound like a wise choice.
However, contrary to popular belief, many users argue that social media is slowly turning into a notorious time-killing machine. Permanently deleting your Facebook account is, therefore, certainly on the menu, but there are a few things you should consider first.
Impact on Your Social Connections
Bidding farewell to Facebook will certainly save you precious time, but what happens to your social connections?
And I’m not referring to the endless birthday wishes or hilarious comment threads, but the personal and professional connections you have spent so much time building.
However, if you have alternative ways to stay connected with your colleagues and loved ones, this isn’t much of an issue. Who knows? Maybe it’s to embrace the joy of personal connections beyond the confines of a newsfeed!
Staying Updated with Concurrent Trends
Facebook and other social media platforms have their way of keeping us up-to-date with the latest viral sensations. So, deleting your Facebook account means you’ll no longer have this constant stream of updates at your fingertips.
Subscribing to news websites, YouTube channels, and newsletters can be a good alternative in that case. Or maybe it’s time you meet groups in real life that align with your interests!
Minimize the Risk of Personal Data Breach
As I said earlier, Facebook has faced its fair share of controversies surrounding user privacy and data breaches. User data is the digital currency of social media, and deleting your account surely keeps you safe from unauthorized data theft.
With Facebook out of your life, you no longer get bombarded with targeted ads. But keep in mind that this also means you no longer get to buy products from the Facebook marketplace.
Potential Loss of Data and Information
Permanently deleting your Facebook account poses the potential risk of losing all the uploaded pictures, the witty comments on your posts, or the heartfelt messages exchanged with loved ones.
But Facebook provides an archive feature where you can download your data associated with the account. Stay tuned to read the full step-by-step guide on how to back up Facebook data on your iPhone.
No Way to Get Back the Old Profile
I think you’re well aware that once you delete your Facebook account, there’s no turning back. You can always create a new account but the old one is lost forever. However, you have a 30-day window to recover the account after confirming the deletion process.
Phase -1: Preparing to Delete Your Facebook Account on iPhone
Now that you know what lies beyond deleting your Facebook account, are you ready to take the next step?
Let’s go through the steps to follow before you delete your Facebook account on your iPhone.
Backing Up Your Facebook Data
Imagine how long it would take to manually download each and every picture or video you posted on Facebook! Fortunately, Facebook has built-in features that take care of this process.
To access or download your information on Facebook, follow these steps-
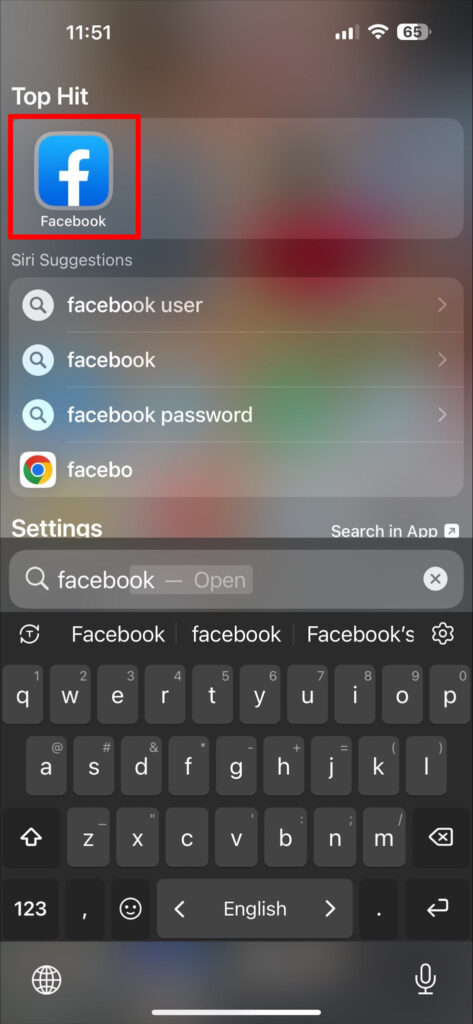
- Open the Facebook app on your iPhone and log into your account.
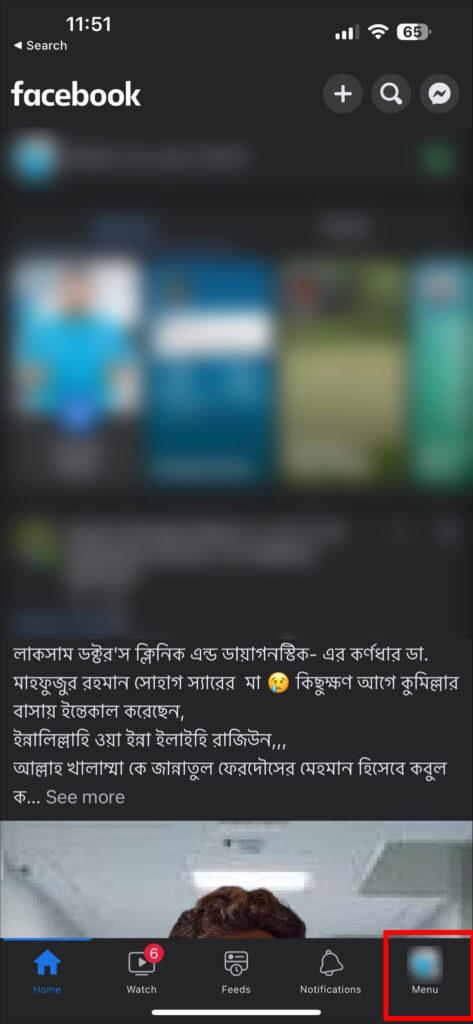
- Tap on the hamburger icon ☰ in the bottom right corner to access the Facebook menu.
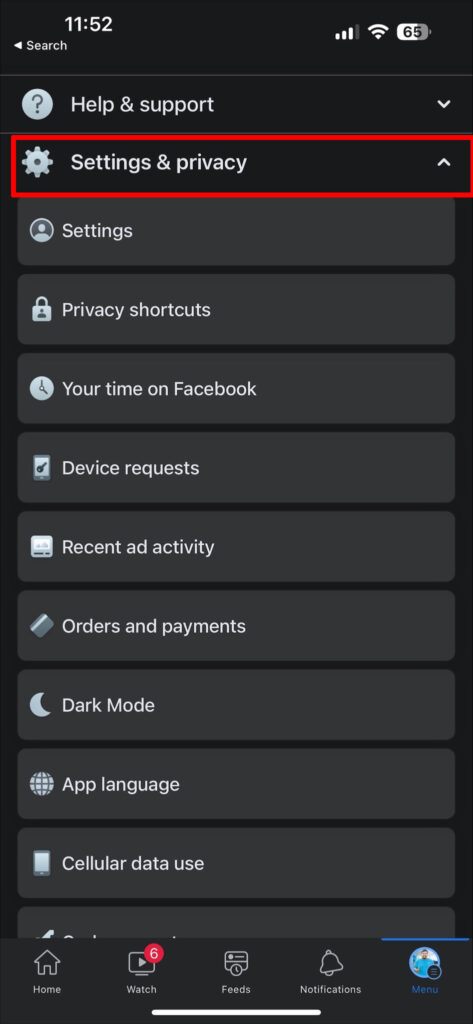
- Scroll down and tap on Settings & Privacy.
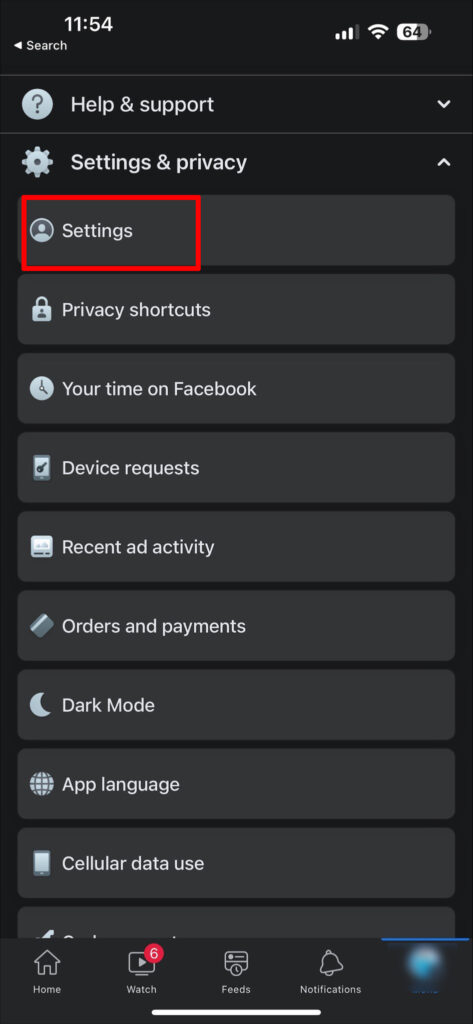
- From the drop-down menu, select Settings.
- Now scroll down until you reach the “Your Information” tab.
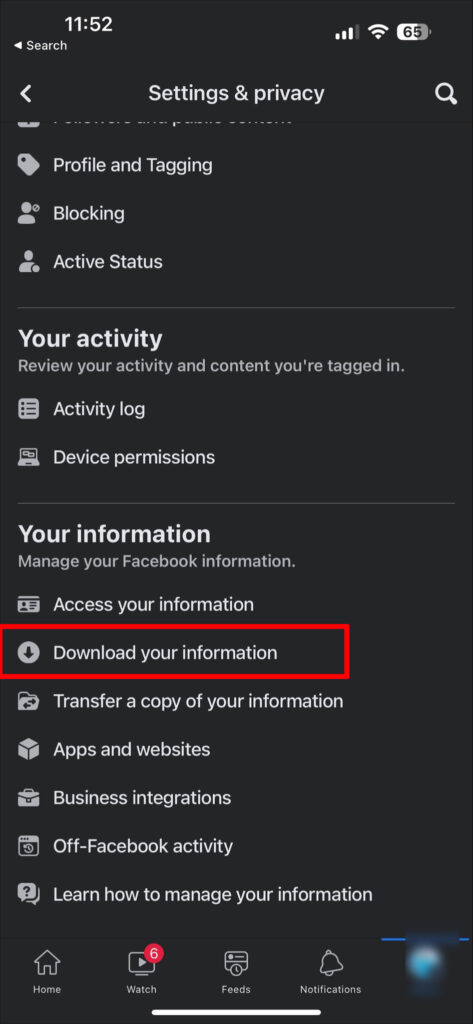
You’ll see a list of available options here. Now I’ll explain how you can back up your Facebook user data using some of these options.
- Access Your Information
This option is not directly related to the deletion or backup process. However, if you want to search for specific types of profile info, this is the place to visit.
From here, you can see your Facebook activity, personal info, connections, security, and other information without searching them manually. You can also use the search bar to directly look for specific profile information.
- Download Your Information
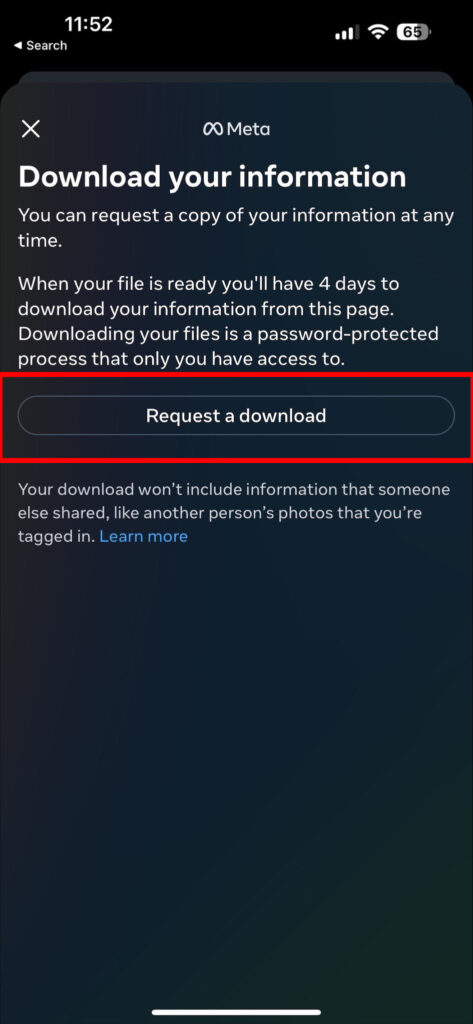
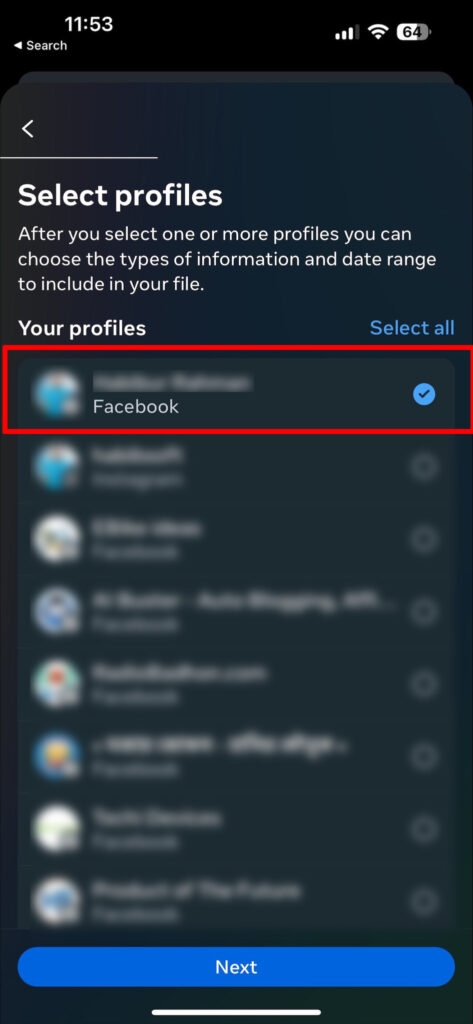
Facebook lets you download a copy of all your information, including posts, messages, saved items, and stories any time you want. You’re free to select the specific data types, date range, download format (JSON/HTML), and media quality.
To create and download a copy of your Facebook account data, go to Settings & Privacy > Settings > Download Your Information and tap on CREATE FILE after you select the data categories you wish to create a copy of. The copy will be available to download in the AVAILABLE COPIES tab.
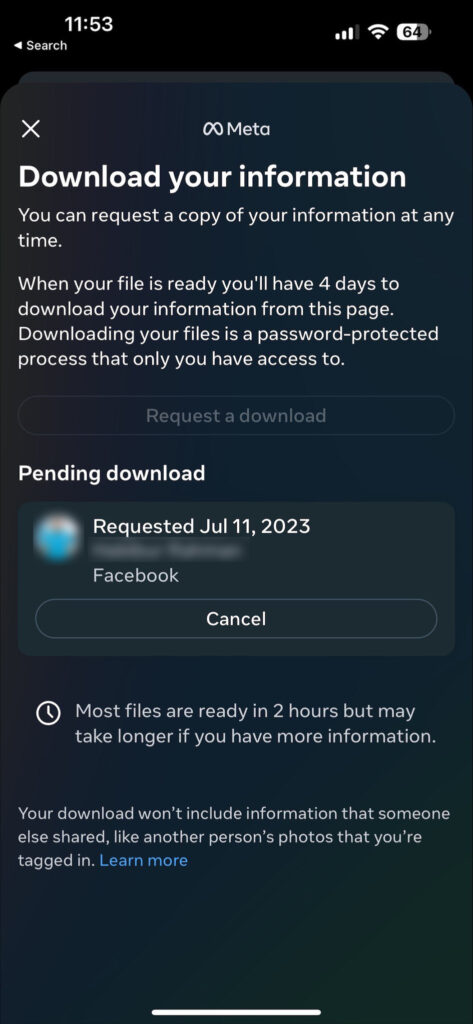
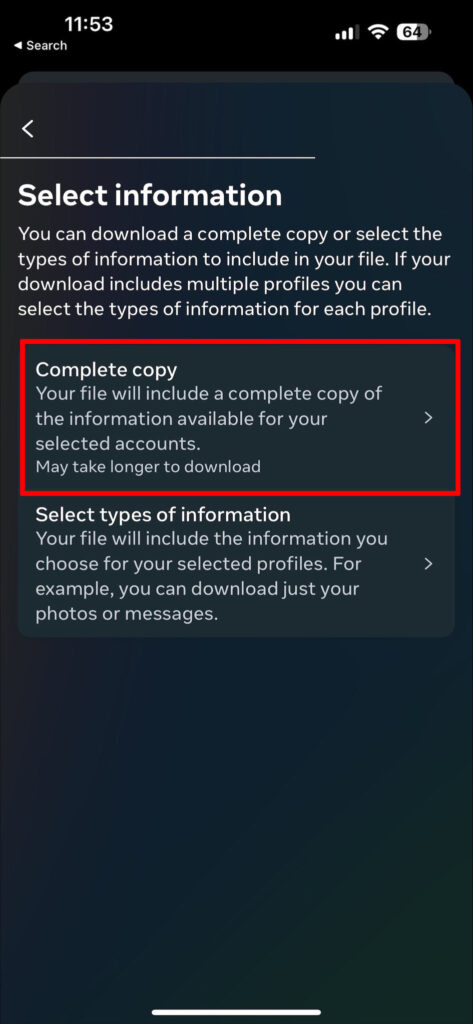
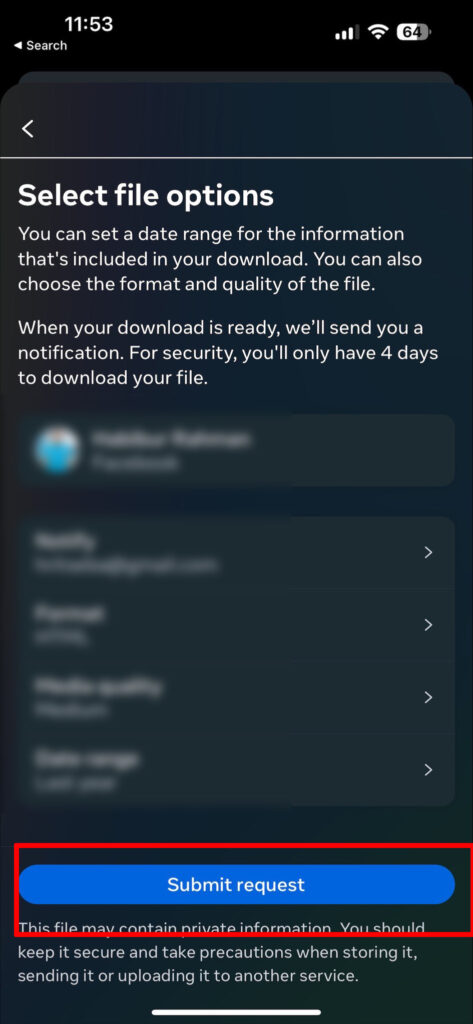
Just make sure you have enough space in your iPhone to download the copy. The size will depend on the data type, how long you’ve been using Facebook and the media quality you’ve selected. So, it’s safe to keep 10-20 gigabytes of free space on your iPhone.
- Transfer a Copy of Your Information
Facebook also lets you transfer the downloadable copy to other services like Google Photos, Google Docs, Dropbox, Koofr, Blogger, and more. This saves you the time and device storage to download the file and then re-upload it to a cloud service.
Managing Connected Apps and Services
In the vast digital ecosystem, we often connect apps and services to our Facebook accounts. Before you delete your Facebook account, take a moment to remove these apps, websites, and services to safeguard your privacy.
From the same settings menu you opened earlier, go to Apps and Websites under the “Your Information” tab.
Here, you’ll see a list of apps, websites, games, and other services you’ve connected to your Facebook profile. Individually tap on each of the apps and then hit the Remove button until the list is empty.
Remove Facebook Marketplace Payment Gateways
Facebook Marketplace is a great way to buy and sell stuff online. So, we often end up linking multiple payment gateways to our accounts.
Removing these gateways before deleting your account will protect your financial information and prevent the risk of data breaches.
To remove all payment methods from Facebook, go to Settings & Privacy, select Order and Payments > Payment methods, and tap on the three-dot icon next to the payment gateway you want to delete. Select Remove and then Done to confirm the process. Repeat the steps for all payment methods.
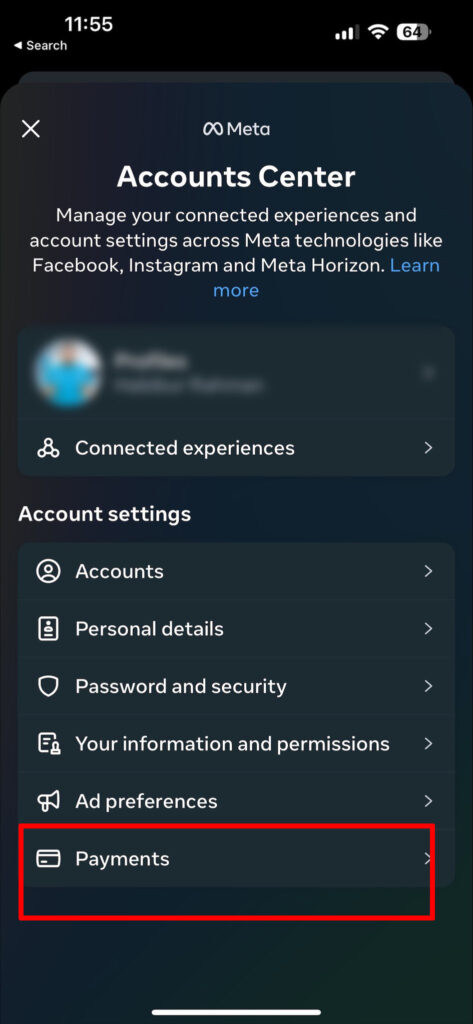
And that’s it! You’ve successfully future-proofed the whole account deletion process. Now it’s time to say goodbye to the account itself.
Phase – 2: Deleting Your Facebook Account on iPhone
The steps to permanently delete your Facebook account is pretty straightforward. Here’s what you need to do.
- Open the Facebook app on your iPhone.
- Tap on the three horizontal lines in the bottom right corner of the screen to open the menu.
- Scroll down and tap on Settings & Privacy.
- In the Settings & Privacy menu, select Settings.


- Now tap on See More in Accounts Center under the Meta Accounts Center tab.
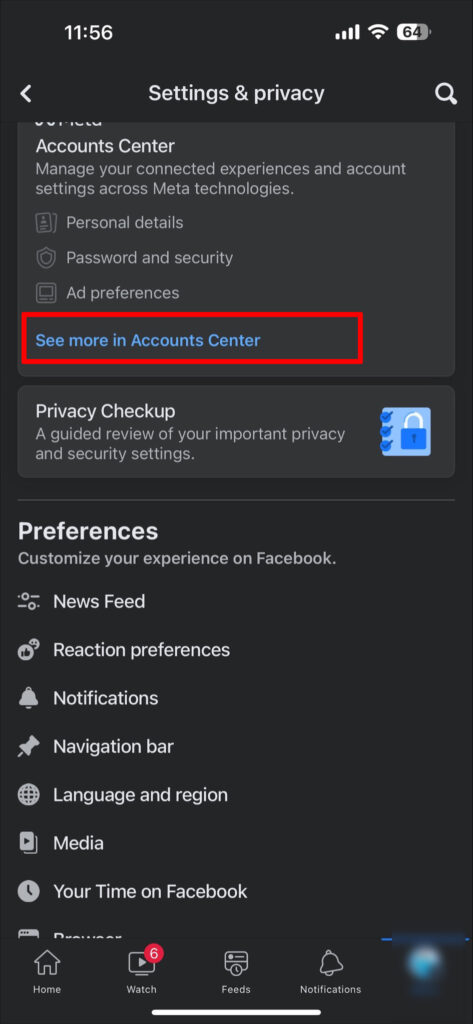
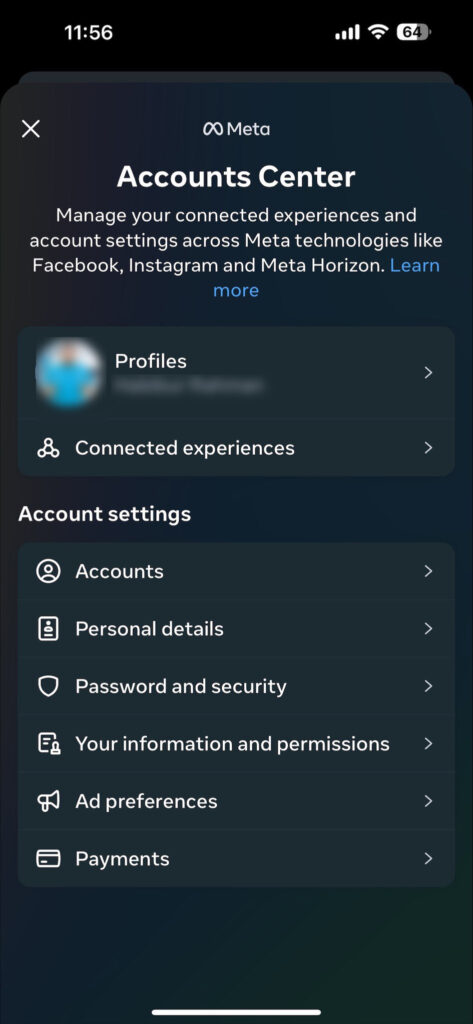
- Tap on Personal Details > Account ownership and control and choose Deactivation or deletion.
If you’re certain that you want to delete your account, choose the Delete account option and hit Confirm. Continue to follow the on-screen prompts to confirm the deletion process.
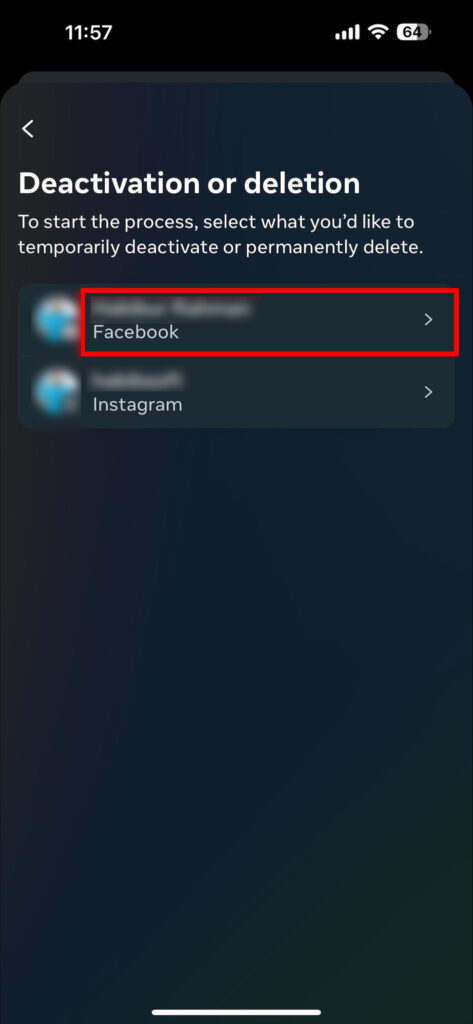
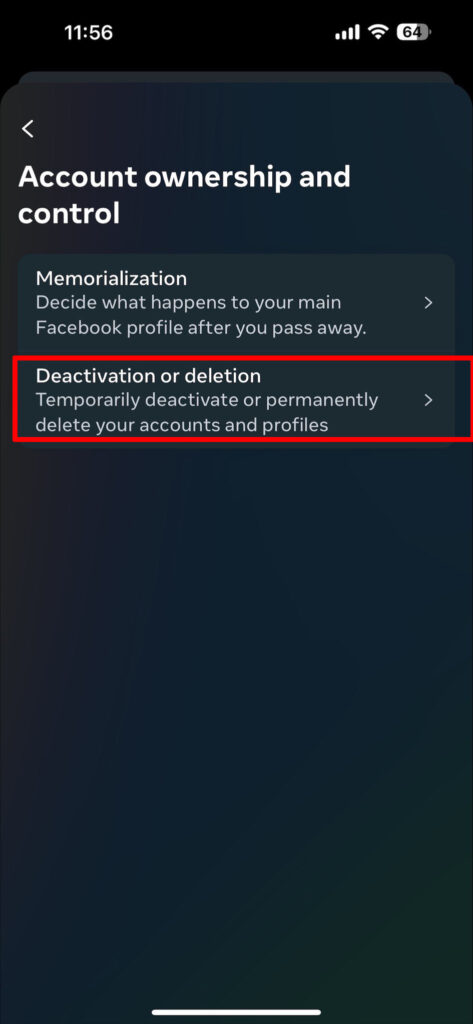
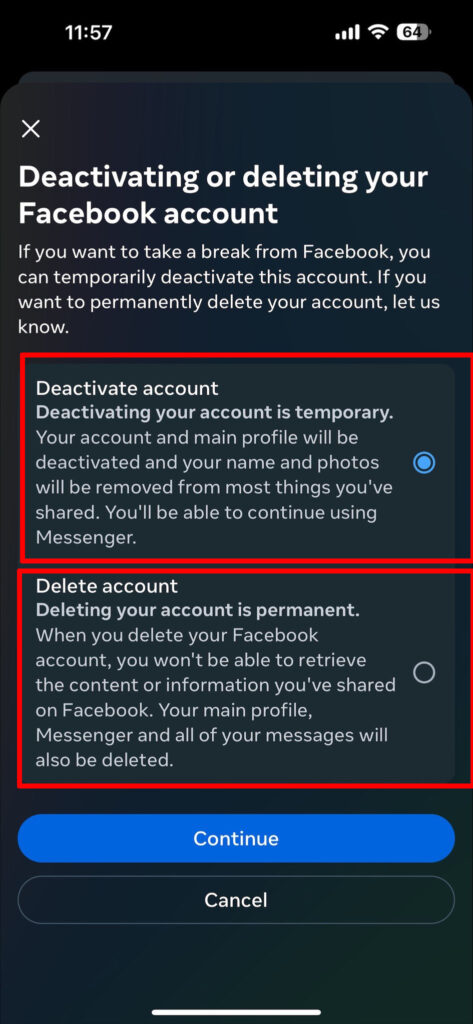
Remember, once you’ve selected “Delete Account” your account will be permanently deleted, and you won’t be able to recover it. Facebook does offer a 30-day window to cancel the deletion process.
To cancel the process, just sign in to Facebook with your credentials and click Cancel Deletion when prompted.
The Alternative: Deactivate Your Facebook Account
Deactivating your account temporarily makes it invisible to other users and services. This doesn’t put your personal information or posts at risk.
You can always reactivate it later and get the exact profile as it was before deactivating.
Deactivating is the best alternative to deleting your account if you just want some privacy or to cut off distractions for a few days or months. Users also opt for this feature to get out of social media addiction and get in touch with the real world more.

To deactivate your Facebook account, follow up till step-6 and then choose Deactivate account. Follow the on-screen prompts and you’ll be done in less than a minute.
Frequently Asked Questions
Can You Deactivate Facebook and Keep Messenger?
Yes. Facebook will ask you whether you want to keep your Messenger active when deactivating the account. Using Messenger won’t reactivate your Facebook account either. Simply download the Messenger app on your iPhone and you’re good to go.
What Happens to My Facebook Messenger Conversations when I Delete My Account?
When you delete your Facebook account, all the messages and shared media will be permanently deleted as well. So, don’t forget to create and download a backup before deleting your account.
Can I Reactivate My Deleted Facebook Account?
You can reactivate deleted Facebook accounts within 30 days of confirming the deletion process. After that period, it’s impossible to recover the profile.
How Long Does It Take for Facebook to Completely Delete My Account?
It takes up to 90 days for Facebook to completely wipe off an account. You can download a copy of your previously created backup file within this time frame.
Can I Delete My Facebook Account Using a Web Browser on My iPhone?
Yes, you can delete your Facebook account using Safari or Google Chrome on your iPhone. The steps are similar to the ones outlined in this article.
Conclusion
Now that you know the full process, I recommend you take a moment and carefully consider both options: deactivating and deleting. After all, it’s only natural to get attached to the Facebook profile you’ve used for so long and now let go of all the memories it carries.
If you’re certain about deleting your account, thoroughly follow the instructions I mentioned to safely complete the deletion process without losing data.
