If you’re an iPhone user, you may have encountered the frustrating issue of being unable to delete a contact marked as “Read-only.”
Having this problem can make it hard to manage your contacts. Fortunately, you have some options when you cannot delete iPhone contact read-only.
Firstly, it’s a good idea to turn off the contact app in Settings before you try deleting a read-only contact. If it doesn’t work, you can try deleting the contact from your iCloud. You can also get rid of the read-only contact by deleting the associated account, such as Whatsapp or Skype.
Let’s look at these solutions in more detail, exploring the best ways to get rid of those pesky read-only iPhone contacts.
Contents
What Does the iPhone Read-Only Contact Error Mean?
The read-only contact error on iPhone means exactly what it sounds like. Meaning you can view the contact but cannot edit or delete it. It also means the contacts synced to the device through iCloud cannot be modified or deleted.
This can happen for several reasons, including:
- The device has been set to read-only mode due to a hardware issue or user setting change.
- The contact was created on another device and synced to your device.
- The contact was imported from a third-party service such as Google Contacts or Facebook.
- The contact was created via an app such as Whatsapp or Skype.
What Is Read-Only?
Read-only is a term that describes files, folders, disk drives, and other digital objects that cannot be modified. It functions like a locked door—anyone can look through it, but no one can change anything inside it without permission.
For example, if you open a Microsoft Word document in read-only mode, you can look at it but cannot save changes or edits.
How to Delete Read-Only iPhone Contacts?
Once you understand what read-only means and why it happens, you can take steps to try and delete the contact. Here are the steps to follow:
Disable and Re-Enable iCloud Contacts Sync
If you’re having trouble with the accuracy of your iPhone contact list, your first step to fix the “Not All Contacts Was Deleted” issue is to disable and re-enable iCloud Contacts sync. Here’s how:
- Open the Settings app on your iPhone.
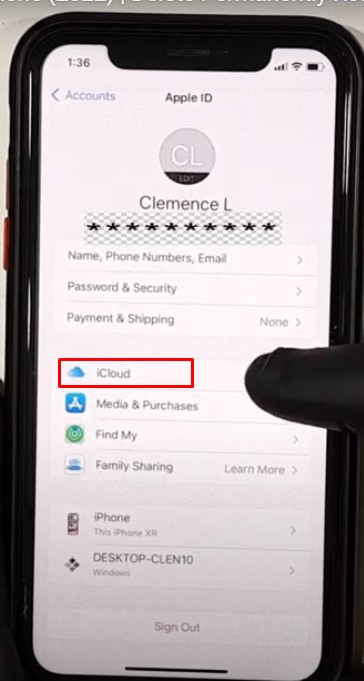
- Tap on your Apple ID name at the top of the screen.
- Select “iCloud” from the list of settings.
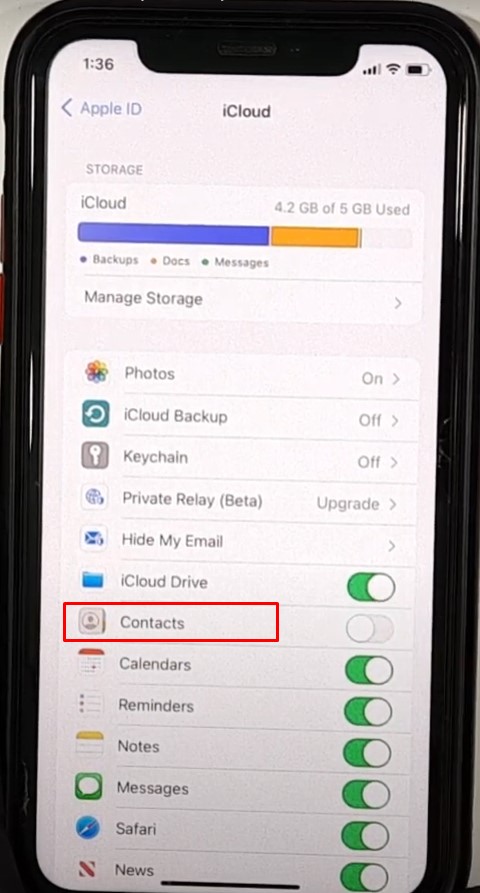
- Scroll down until you see “Contacts,” and click that.
- Toggle off “Contacts” so that it is disabled.
- On the following prompt, confirm deleting your iPhone contacts. Don’t worry; you won’t lose them permanently, as they’ll still be stored in iCloud.
- Check if the targeted contact is still listed in the Contacts app.
- To sync iCloud accounts again when you have empty contacts, simply enable the Contact app again.
Delete the Contact from iCloud
If disabling and re-enabling Contacts sync doesn’t work, you may want to try deleting the contact from iCloud. To do this:
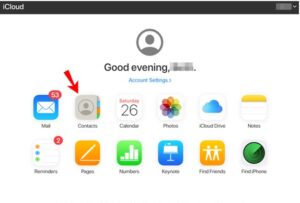
- Go to iCloud.com and log in using the same Apple ID that you use on your iPhone.
- Go to the Contacts app, select the contact you want to delete, and click the “Delete” button.
- Confirm that you’re sure to delete the contact and confirm again on the following prompt.
- Go back to your iPhone and check if the contact is still listed in the Contacts app.
- If it’s not, then the contact has been successfully deleted.
Delete the Contact from Its Associated Account
The final solution is to delete the contact from its associated account, such as Whatsapp, Google Contacts, or Skype.
You can just go to the account where the contact is located and delete it. However, if it doesn’t delete, you’ll have to clear the app data from your device. To do this:
- Go to the Settings app and select “General.”
- Tap on “Reset” and select “Erase All Content and Settings.”
- Make sure to back up your data before you do this, as it will erase all of your data from the device.
- Once the reset is done, you can re-install any apps on your device, including the app where the contact was located.
Finally, check the Contacts app on your iPhone. You must have deleted it successfully by now.
Frequently Asked Questions
If you have further questions about how to delete read-only contacts on your iPhone, the following list of answers to frequently asked questions may be helpful.
How can I tell if a contact is read-only on an iPhone?
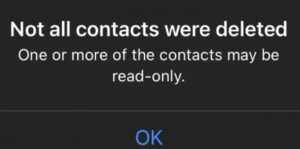
When you have read-only contacts on your iPhone, the message – “Not All Contacts were Deleted One or More of the Contacts may be Read Only” will pop up when you try to delete them. The read-only contact may also be grayed out, and you won’t be able to make any changes to it.
Is there a way to prevent contacts from becoming read-only in the future?
There’s no concrete way to do it, but you can make sure your contacts are always up to date by enabling iCloud Contacts Sync. It ensures that any changes made to the contact from its associated account are automatically synced to your iPhone, including the contact’s read-only status.
Will restoring my iPhone from a backup fix the read-only contact issue?
No. Restoring from a backup simply brings back the settings and data you had before the backup was taken. It does not address any errors or faulty settings caused by read-only contacts. However, if the contact wasn’t on your phone at your backup time, it likely won’t show on your contact list.
Why do some contacts created by third-party apps become read-only?
Third-party apps, such as Whatsapp or Skype, create contacts in their own databases. These contacts show up in the Contacts app. However, because their databases are separate from the device’s database, these contacts may become read-only if you don’t clear it from that specific app.
Conclusion
Getting stuck with unwanted contacts isn’t a big deal for your iPhone, but it can be quite annoying. After all, it can be irksome at the most inconvenient times when you need to delete a bothersome contact, but the “read-only” label prevents it.
But as you can see, there are multiple ways to solve the problem of read-only contacts on your iPhone. And hopefully, you will be able to resolve this issue with one of these methods.
Last but not least, be sure to keep your contacts up-to-date and backed up so you can restore them in case they get deleted, along with the ones you want to get rid of. Good luck!

